Build Project #13 – My First Cutting Board

Apparently, in woodworking, a “rite of passage” is a cutting board.  There are many, many, many different styles of cutting boards.  Edge grain, end grain, cut out face grain, but the most enjoyable ones to look at seem to be the “end grain” variety.

A few weeks ago, I purchased some maple, cherry, purpleheart, and wenge wood that I thought I would eventually work into a cutting board.  For my first cutting board, I chose maple and cherry.

This would be my first time to use my new “planer” – which I bought from Butch, a guy at our church who is a phenomenal craftsman that used to build homes, and now builds custom furniture.  He had an old 10″ planer he was no longer using.  I bought it from him, and it is going to change how I do my woodworking.

For the edge grain boards, you simply cut the wood into strips, glue it together, cut it again, glue them together again, and repeat the process until you like what you have.  Here’s what I did:

I cut the maple and cherry into equal width strips.  My planer is only 10″, which means I can only make a design that is 10″.

I glued up my strips.

And after sitting overnight, I cleaned it up, ran it through the planer, and cut them into strips again.  This time, I turned them on their edge, and glued them up again, after making the pattern I wanted.  I decided to go for a fun checkerboard design.

After sitting overnight, I cut it into the final shape, trimming off the edges.  It was here that I discovered my miter gauge was horribly cheap and not square at all.  After many attempts – I ordered a new miter gauge.  I’ll show that at a later project.

After I finally got the board sides straight, I realized I needed a way to easily pick up the cutting board.  Since I still don’t have a router to cut handles into the sides of the board, I decided on making a bevel cut, so it could easily be lifted.

I sanded it down, and it started to look even better.  But the real fun is after you put the butcher block/cutting board oil on it.

Here it is in its final resting place in our kitchen.

Build Projects #9, 10, 11 and 12: Some Catching Up

Let’s start with project #12.  Here in Florida, a lot of homes have these ledges around the house for you to put knick knacks and stuff on.  I’ve dreamed of building something to put up there – and finally figured out what I wanted to do.

I initially saw something similar to this on April Wilkerson’s Youtube channel.

I cut out a “W” from some scrap plywood probably 6 months ago.  This is something I’ve wanted to do for a while.  Problem is, I needed some scrap wood for it.  Well, it takes a while to accumulate scrap wood!

Photo Jun 30, 1 18 12 PM

I took the scrap wood after I had enough to do the project – and painstakingly assembled it on the “W” like a puzzle.

Photo Jun 30, 1 18 38 PM

Since I don’t have a brad nailer of any type, I had to rely on good ole’ wood glue, which made it take a little longer.

After all the pieces were glued on and secured – i took the jigsaw and cut off the edges.

Then, after some vigorous sanding – i applied some dark Danish Oil.

The final resting place of our new “W.”

Photo Jun 30, 5 40 23 PM

A couple of months ago, we had our annual church auction to raise money for our Honduras Trip that members of our church go on to do things for people of that nation.

For the auction I made three things – a tic tac toe game, a necklace holder, and a doll cradle.

Here’s the Tic Tac Toe board:

Photo May 29, 8 41 10 AM

Here’s the necklace holder.  It’s made of Honduran Mahogany and Aromatic Cedar:

Photo May 29, 8 43 14 AMPhoto Jun 02, 11 37 33 AM

Here’s the doll cradle:  The first one I made actually broke when the buyer got it home — and I realized why.  I made the grain go the wrong way.  So I cut off the rockers and made new ones, and then braced it up against the existing cradle.

Build Project #8: A Bookshelf

I recently completed my 8th (official) woodworking project of the year.  It’s a simple bookshelf, that ended up taking quite a long time due to sickness, stress, and stupidity.

The shelf is the second to last project in the Weekend Woodworker course by Steve Ramsey.  I had a few issues with this simple build, mostly because I didn’t pay attention to some of the instructions.  However, I’m learning that woodworkers aren’t supposed to disclose mistakes, because most people would never see them unless they’re pointed out!

Starting out with some simple cuts.

I started by assembling the base. The base was mitered, and then put some brace pieces on for later in the project.

The base, almost fully assembled. I attached 2 more brace pieces before I was done.

This is the body, or the “carcass” of the bookshelf. I have to say, I truly hate the strap clamps, but they work well.

Whilst in the middle of the project, my old Black and Decker drill finally bit the dust. Part of the reason this project took a while was because I had to decide what to replace it with.

My wife decided it was time to stain one of the bar stools I made for our kitchen. Isn’t she a beauty?

I had to cut dadoes or rabbets or whatever these are. Got a bit sloppy with the glue.

The carcass is done. I was supposed to use one sheet of 1/4 inch plywood for the back, but I used two pieces I had left over. I’m going to paint this, and there will be a shelf covering the crack, so it won’t matter.

My clamp collection is growing, out of necessity.

This shelf has decorative trim pieces on the front. These gave me more trouble than I thought, because I didn’t quite measure correctly.

I ended up popping a few screws in to the decorative pieces. I went back and covered them with wood filler.

Behold, the final project. The top has a decorative wrap around it. We haven’t painted it yet, but when I do, we’ll share an update!


Again, special thanks to Steve Ramsey’s Weekend Woodworker course.  It’s taught me a lot – and I still have one project left to go, which I am currently working on.  It’s been so much fun.

Stay tuned for more projects!


Build Project #7: A Set of Shelves that are Also Stairs

My first woodworking project ever was my daughter’s bed.  I built her a loft bed this past summer that you can read about HERE.

One of the problems in our home is that the secondary bedrooms are small.  Most newer Florida homes seem to have smaller secondary rooms.  It just doesn’t leave a lot of room for extra things in our young daughter’s room.  That’s why I built the loft bed in the first place – to get her bed up off the floor so she would have more room to play in her room.  One of my next projects will be to add a desk under the bed.

The one problem with the bed is that it was not easy to get in and out of.  I had a ladder on the end that was built into the bed.  But I decided to kill two birds with one stone – add storage into the room, and make it easier for her to get in and out of her bed.

While this project was not overly complicated – and the design was very rudimentary – it has made her room and her life a lot easier.

I started with some very thick, heavy, wide boards – some 2″ x 12″ boards.  The idea – make shelves and stairs, without spending a lot of time and money.

Here’s what I came up with:

I started out with a crude design in my sketch book. While it didn’t end up exactly like this, it helped a ton in figuring out how much wood I needed, and how big the shelves needed to be.

Measuring, marking, and cutting the first piece. Using a circular saw, I was able to just set the depth and cut it right on my mobile work bench.

The cuts for the stairs/shelves.

Using my Rockwell Jawhorse extension piece to balance the back part of the shelves so I can begin attaching the other pieces.

Starting to come together. I’m not going to cover the screws, because in the original bed, I left everything exposed – plus – we’re going to paint it this summer.

Placing the stairs by the bed. I attached them to the bed with some “L Brackets.” Very sturdy, and it’s not going anywhere. The loft bed had handles on it already for her to climb into it, so the height of the stairs went just under where those handles are.

Josie started filling her shelves right away!

She loves the stairs! It makes getting in and out of her bed so much easier!! You can also see in this picture the bunk bed I made for her American Girl Dolls. That’s where the desk will go eventually.

SaveSave

Build Project #4, and #5 – a Chair and an Office Accessory

I’ve been taking part of an online woodworking course called the Weekend Woodworker led by Steve Ramsey.  It has been great fun, and I’m learning how to do a ton of awesome things.

For my 4th and 5th projects of the year – one of them was part of the course, and one of them was not.

First up, a paper holder.  I know, it doesn’t sound awesome and amazing – but it taught me some great skills on the table saw, and even led to a “mini-project” where I learned how to make a pushstick designed by woodworker Matthias Wandel:

The paper holder took just a few small cuts on one 1×4 board, and a piece of plywood:

First up was learning to cut some rabbets on the boards:

I had to cut an opening in the front piece for being able to grab the papers out of the holder:

Then I had to put them all together:

Next I had to rip the sheet of plywood, which I did not enjoy.  I got it cut a bit too much and it didn’t fit exactly like I wanted it to, but that’s okay, it’s on the bottom.  I cut it out and then glued it in place:

After that dried up, I cut some decorative bevels into the top:

The last step was to make a paperweight – which consisted of just gluing up two boards together.  You’re supposed to add personalization to it, I just haven’t gotten around to it yet.

After I made this, I thought it was time to try something not part of the course – and we’ve been needing some barstools for our kitchen area.

This project was really more of a “let’s see if I can do it, and if I can, I’ll make a better one later” type of project.  I began with some 2x4s and cut them down to some lengths that would work well for the project:

This project, I was finally going to use pocket holes.  I don’t have an expensive “Kreg” jig, but rather I had purchased a pocket hole jig from Harbor Freight.

The only thing I don’t care for about the HF jig is that I can’t adjust the height of where the holes go in the board.  It ended up working out just fine for this project, but I can see where in the future it may restrict me from using them in all projects.

Pocket holes are supposed to “hide” the screw, and then you can go in and fill the holes later, or you can just leave them if you’d like.  Here’s the jig, and here’s how it works:

I am using the Kreg brand screws – they were a gift from my wife at Christmas.

After getting all the holes drilled, I started to piece things together:

After putting the braces in, and then putting on the seat boards, here’s what it looked like:

The chairs will fit perfectly in our kitchen/living room area under the kitchen counter.  However, they are a bit clunky – so I may go back to the drawing board and make something a bit less of a large footprint.

Regardless, even if we don’t use it in the kitchen area, I now have a great seat for my garage/workshop area.

Build Project #3: A Bench for Our….

In my year of woodworking projects, a lot of it is learning.  And I’m learning that wood glue can be pretty daggum messy.

My 3rd project of the year is a bench.  I haven’t yet figured out where this will go.  It may go in our room as a place to sit while putting on shoes.  It may go in my wife’s classroom for her to use as a reading bench.

I have to admit, I didn’t get as many pictures of the build process this time.  The reason – well, a lot of this build was gluing and sanding.  That’s not exactly the most exciting stuff in the world.

The goal:  turn this stack of wood (well, part of it) into a beautiful bench.

Using only 1x3s and 1x2s, I was able to achieve this.  First I had to cut out the legs.  I did this by gluing and screwing some boards together:

While I was working on this project, I had a few visitors:

Sand Hill Cranes are a truly beautiful species.  They make one of the most amazing sounds of any bird I’ve ever heard.  They also mate for life, and return to their home each year.  Josie calls them Sandy and Bill.

Like I said, I didn’t get many shots of the build itself, but here’s the final product.  I used Watco Danish Oil for a finish.  Man, that stuff is messy, but it ends up making things look amazing:


SaveSave

Build Project #2 – Casual Table for Our Porch

We have a beautiful back porch that overlooks a small lake here in Tampa.  We have a hammock, 2 rocking chairs, and a glider that belonged to my grandparents in Nashville.  But the one thing we didn’t have was a table to sit next to those things while we were enjoying a beverage and the view.

So it was time to build a table.  I went to the local Lowes store to buy some simple pine boards.  This project was made out of 1x3s and 1x2s.

Now that I have my portable workbench, making cuts is so much easier with my miter saw.  Here are the boards (post cut) that I will be using in the project:

The table calls for a tapered edge on the bottom, so I had to take my miter saw and chop off some angles:

Assembly would prove to be a bit tricky.  Everyone hates it when the table you are using wobbles.  Steve Ramsey from Wood Working for Mere Mortals suggests setting up a system like this to make sure everything is flush and square:

Using wood glue, clamps, and screws, the legs were successfully made:

Now it was time to assemble the two sets of legs together.  This was a bit more challenging, but by using the same setup, I was able to get things put together:

Well, it is starting to look like a table:

Now it was time to put the slats on the table.  I had to put some support brackets to attach the bottom shelf.  It was tricky to space these out since I just eyeballed it instead of using any sort of spacers (the vice is being used as a weight across the board since I ran out of clamps):

After cutting off the edges to give the slats a beveled edge, it was time to put the top pieces on.  These were just put on with glue, no screws.  So I grabbed some extra boards to hold them down while being clamped:

Here’s the table with the assembly complete:

But I still had to finish it with some fun paint.  After some sanding, Kristen helped me pick out a nice red color that matched the porch decorations.  It was an outdoor Valspar Spray paint from Lowes.  Here’s the table, completely finished, sitting in between our two rocking chairs:

All in all, this was pretty simple to make.

Again, credit for the plans goes to Steve Ramsey and his Wood Working for Mere Mortals site.  This table was a lot of fun to build.  It matches our porch perfectly, and is fun, casual, simple, and will hold many a Diet Dr. Pepper on it in the future.


2018 Woodworking Projects – A Work Bench

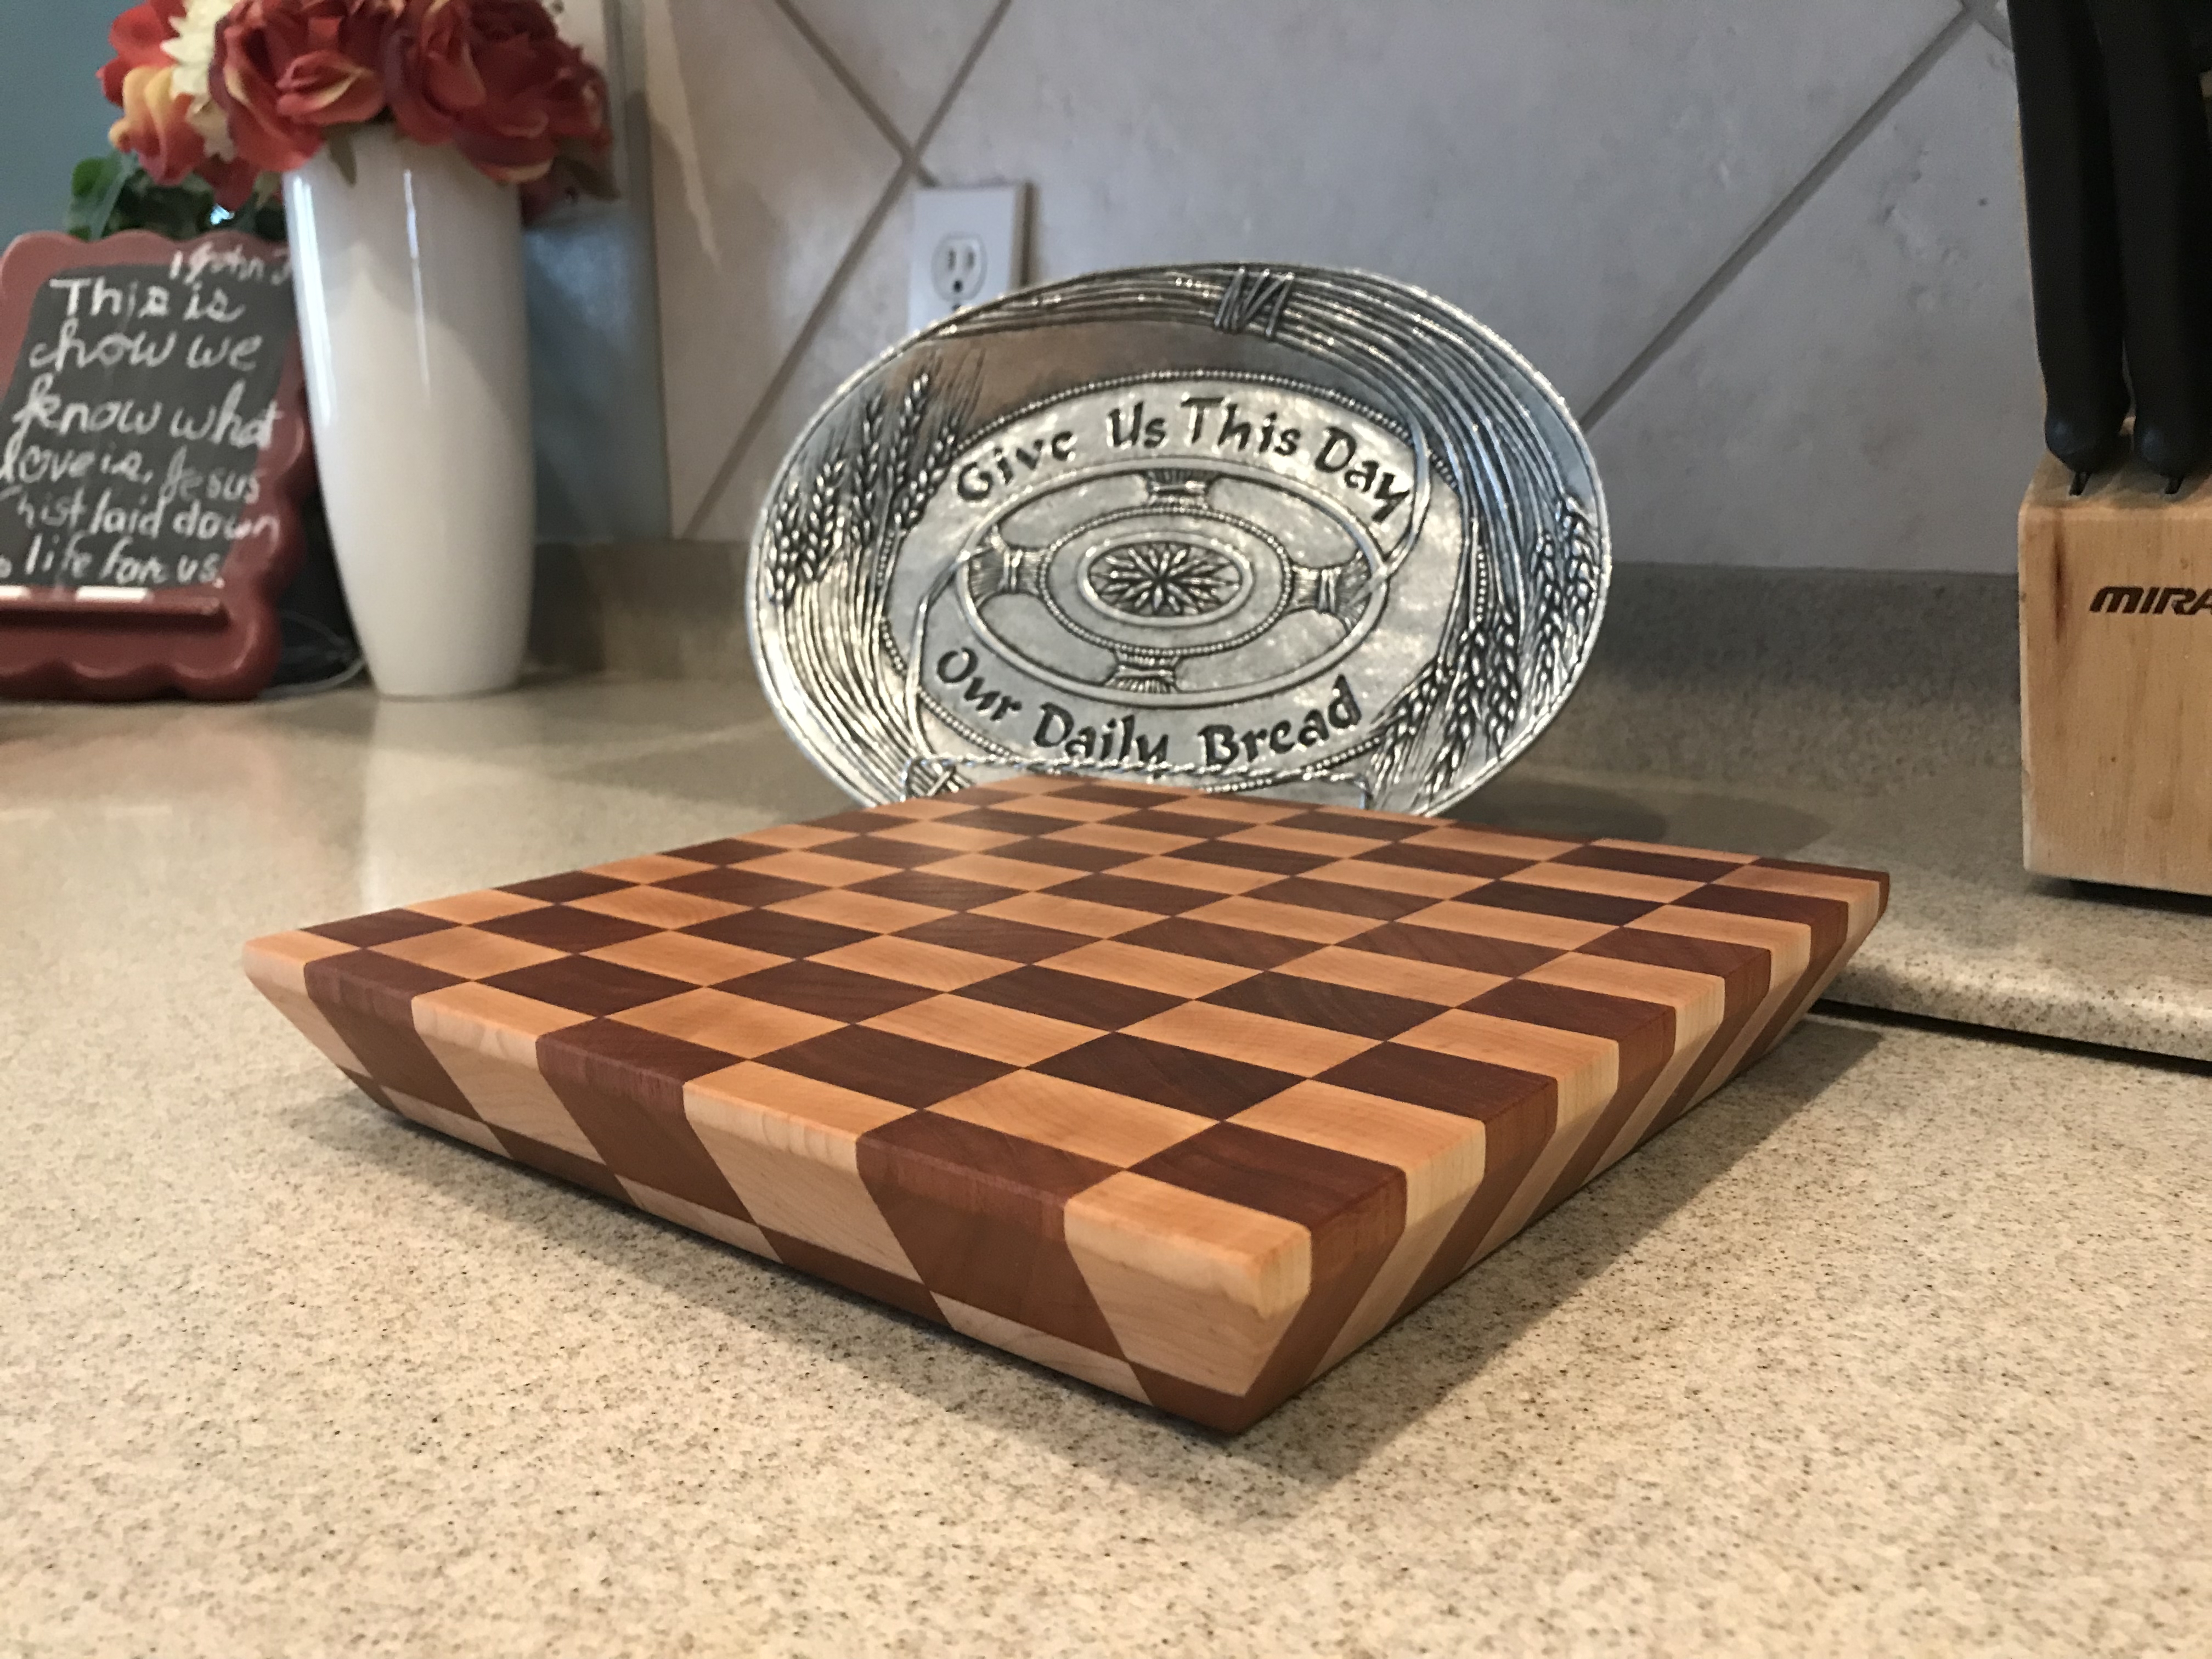
Everyone needs a good hobby.  Never in a million years did I think I would ever enjoy building things with wood.  Sure, I loved using building blocks when I was a child (who am I kidding, I still love it…) but I never thought I’d be using nails and screws and saws to build things that matter.

Our garage is the site of what I hope to be many fun and exciting woodworking projects in the year 2018.  I started with cleaning out the garage from all the Christmas decorations and then spent some Christmas money I received on a few new tools that I’ve been wanting.

My first project of the year was something I really did need to build first in order to do any other projects in the future.  A workbench.  To be more specific, I built a mobile workbench that could roll out of the way when not in use, so our garage didn’t become too cluttered.  If you’re interested in how I built this, continue reading to see what I did, and how I did it.

To start – I want to recommend Steve Ramsey and his youtube channel Woodworking for Mere Mortals.  He does such a great job of teaching and explaining how to do things.  It almost seems like he’s in my garage with me giving me step by step instructions on how to do this.

I used a miter saw, drill, screws, wood glue, some 2x4s, and some leftover plywood.  Remember, I had the hurricane boards for my house.  Well, I kept all the ones for the windows around the house, but the back porch boards, we decided that they just took up too much room in the garage, and we don’t really need them since there’s really nothing on the back side of our house except a lake.

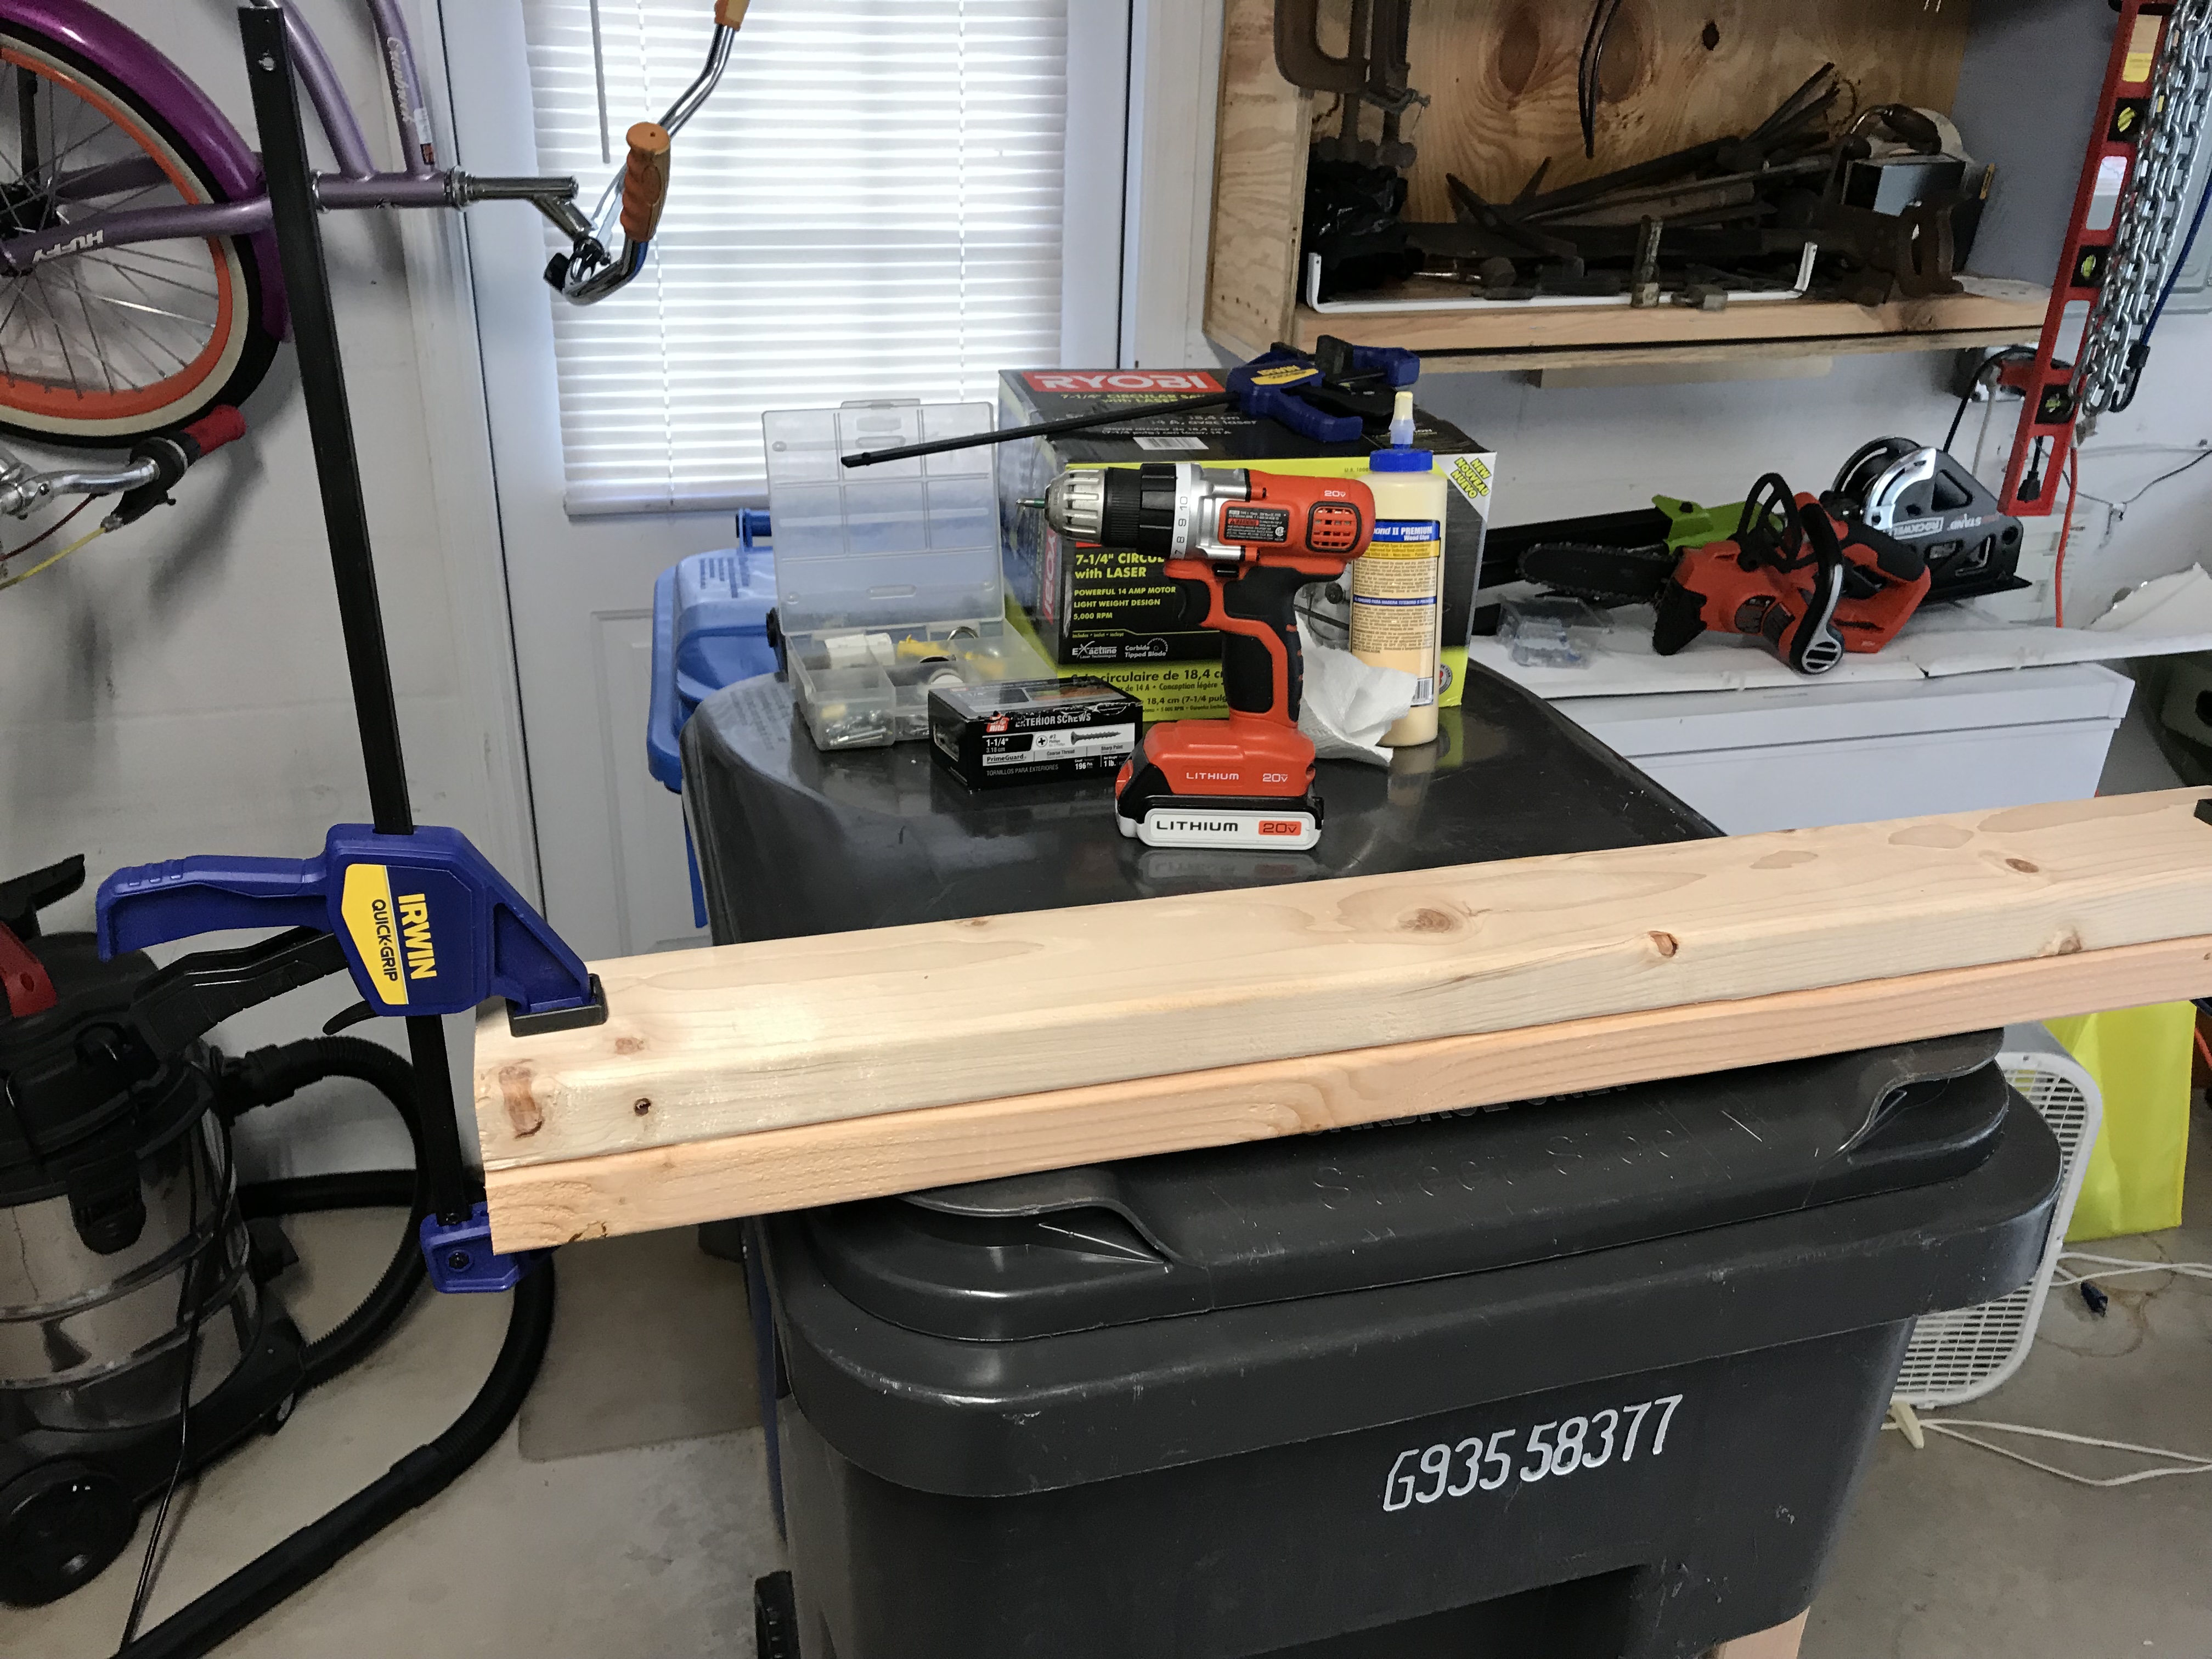
So here’s where I started – a few boards, a Diet Dr. Pepper, and some determination.

One of the really great things about using the Steve Ramsey videos – he taught me how to use my Mitre saw a lot more efficiently and correctly.  Here, I have it set up on top of one of my new toys I bought for Christmas – a Ridgid Table Saw (insert Tool Man grunt sounds here…).

There’s a reason why I decided to build this mobile workbench, and the fact that I have my miter saw on top of a table saw box is one of them.  But the other reason is this:

I have nowhere to do my work.  Here you see me setting up shop on top of my Hillsborough County garbage can.  Not a lot of space, great height, though!  This is why I need a workbench.

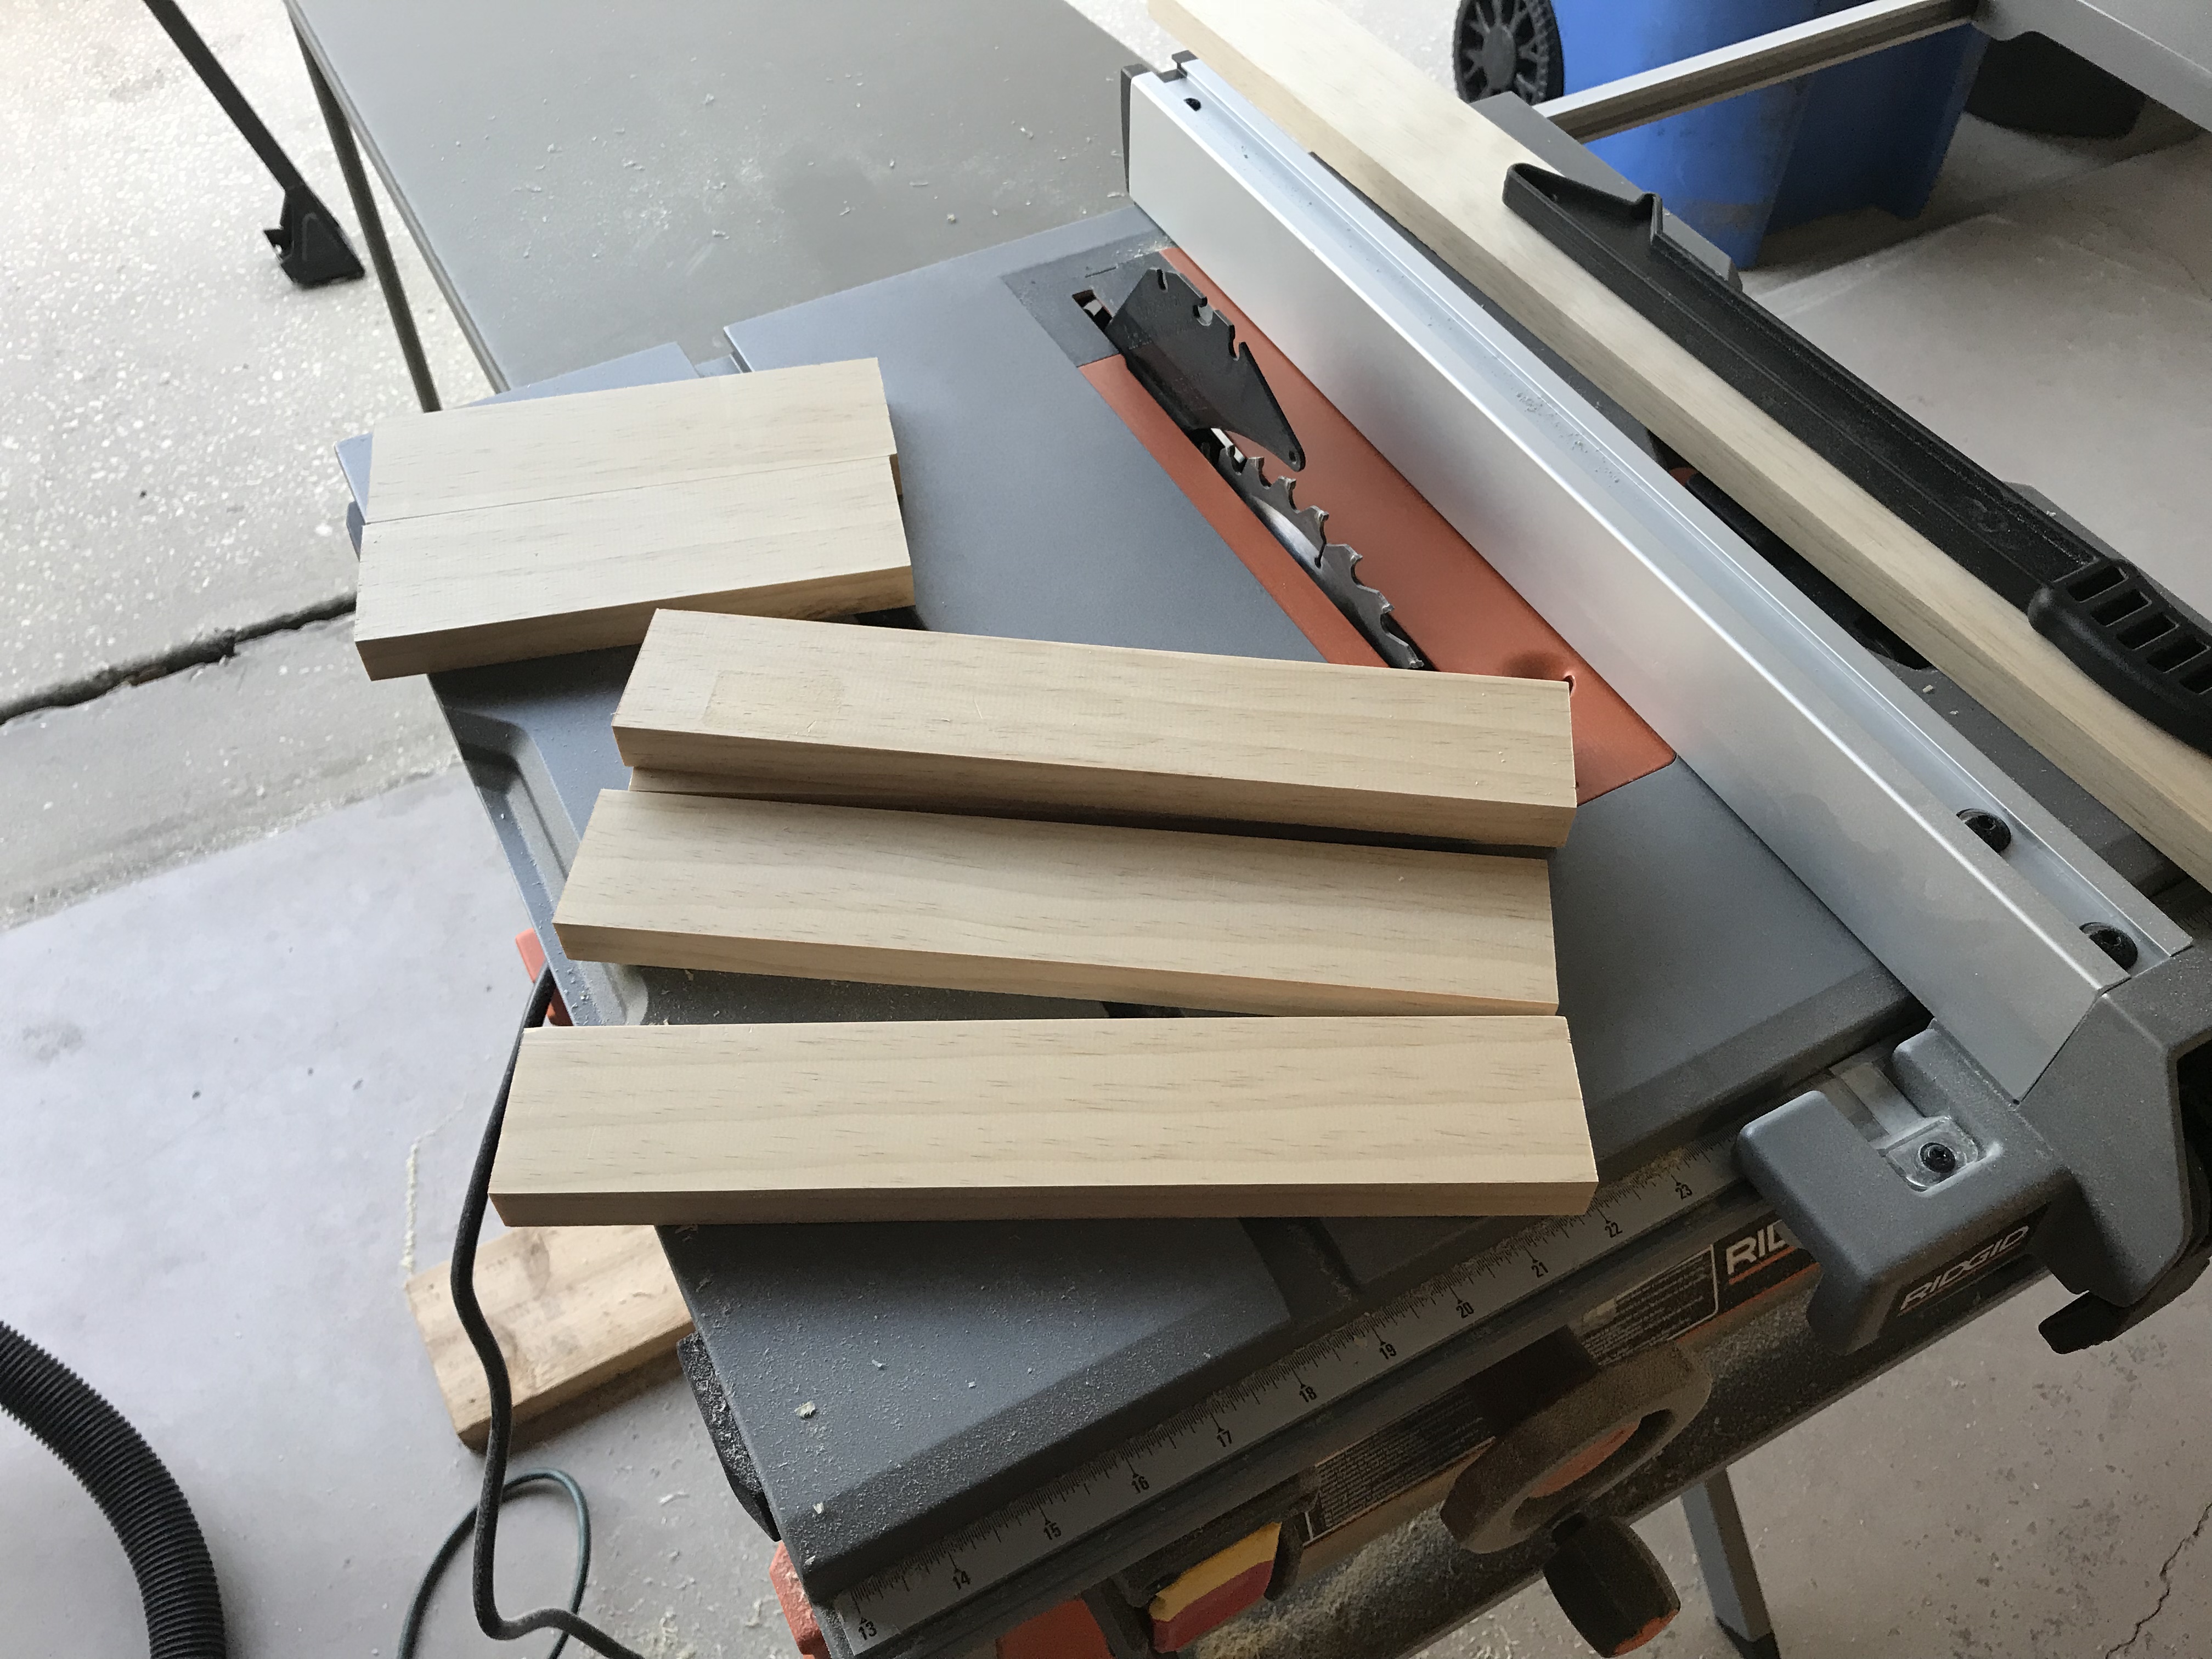
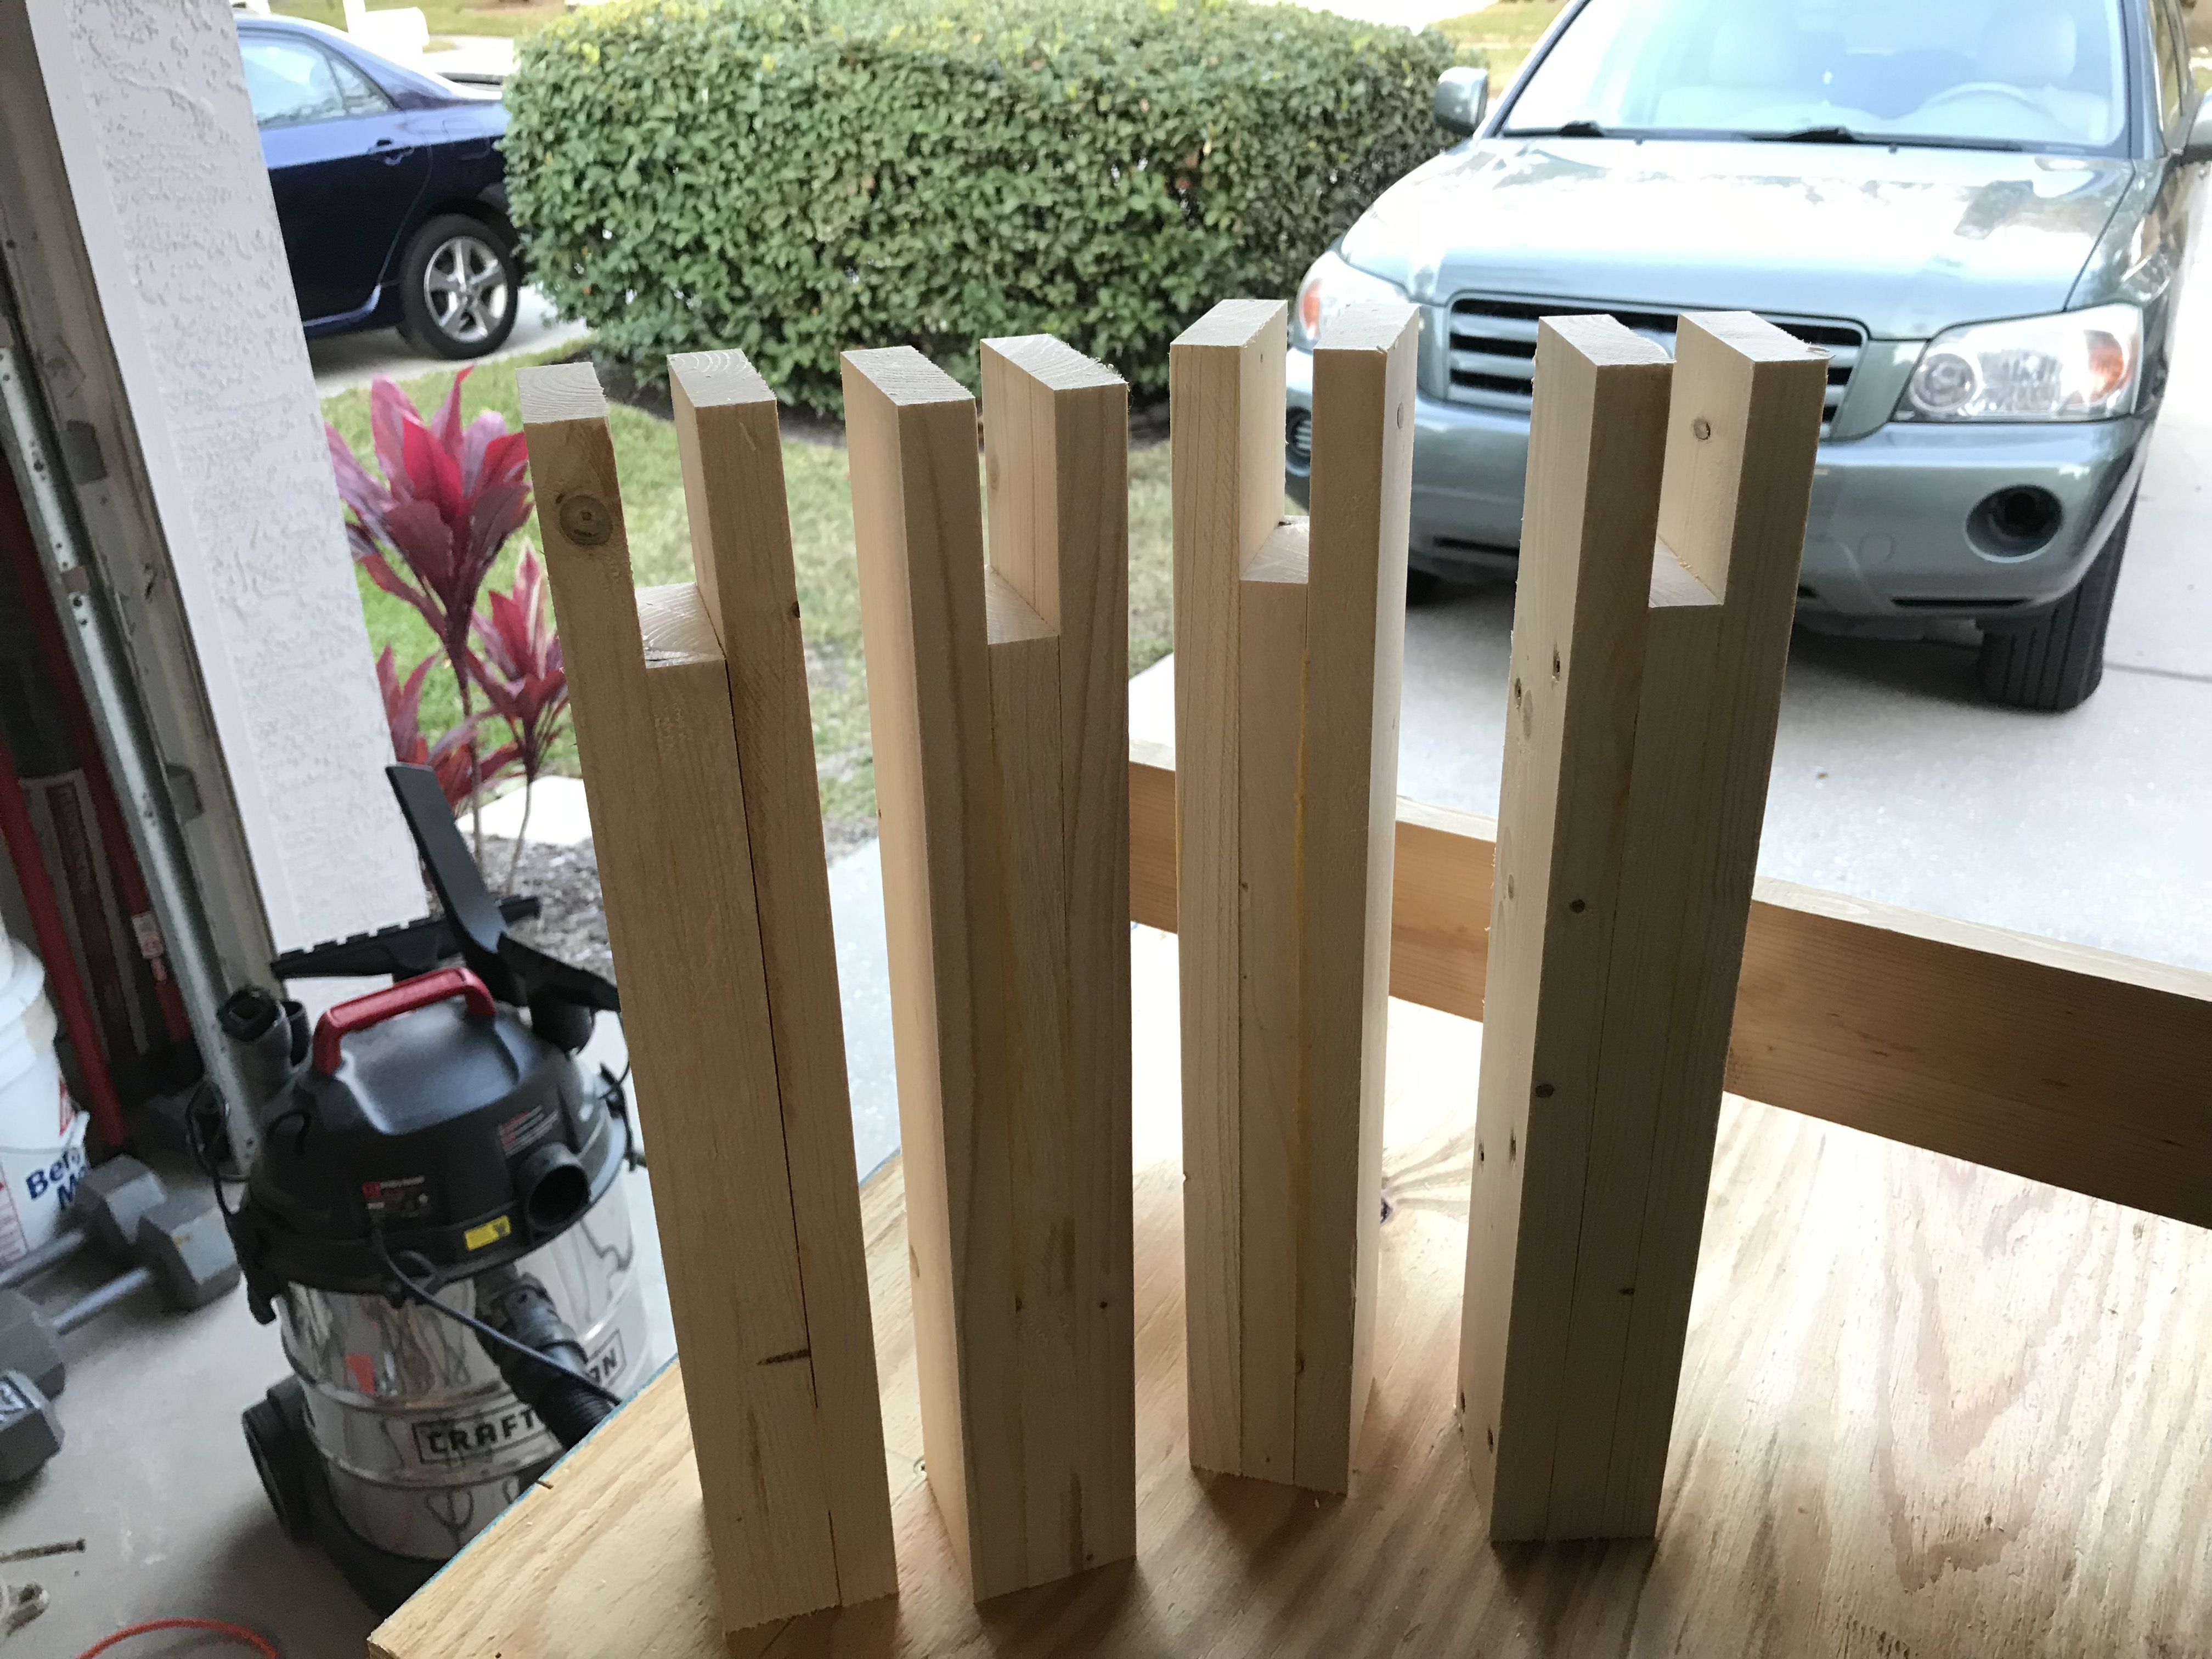
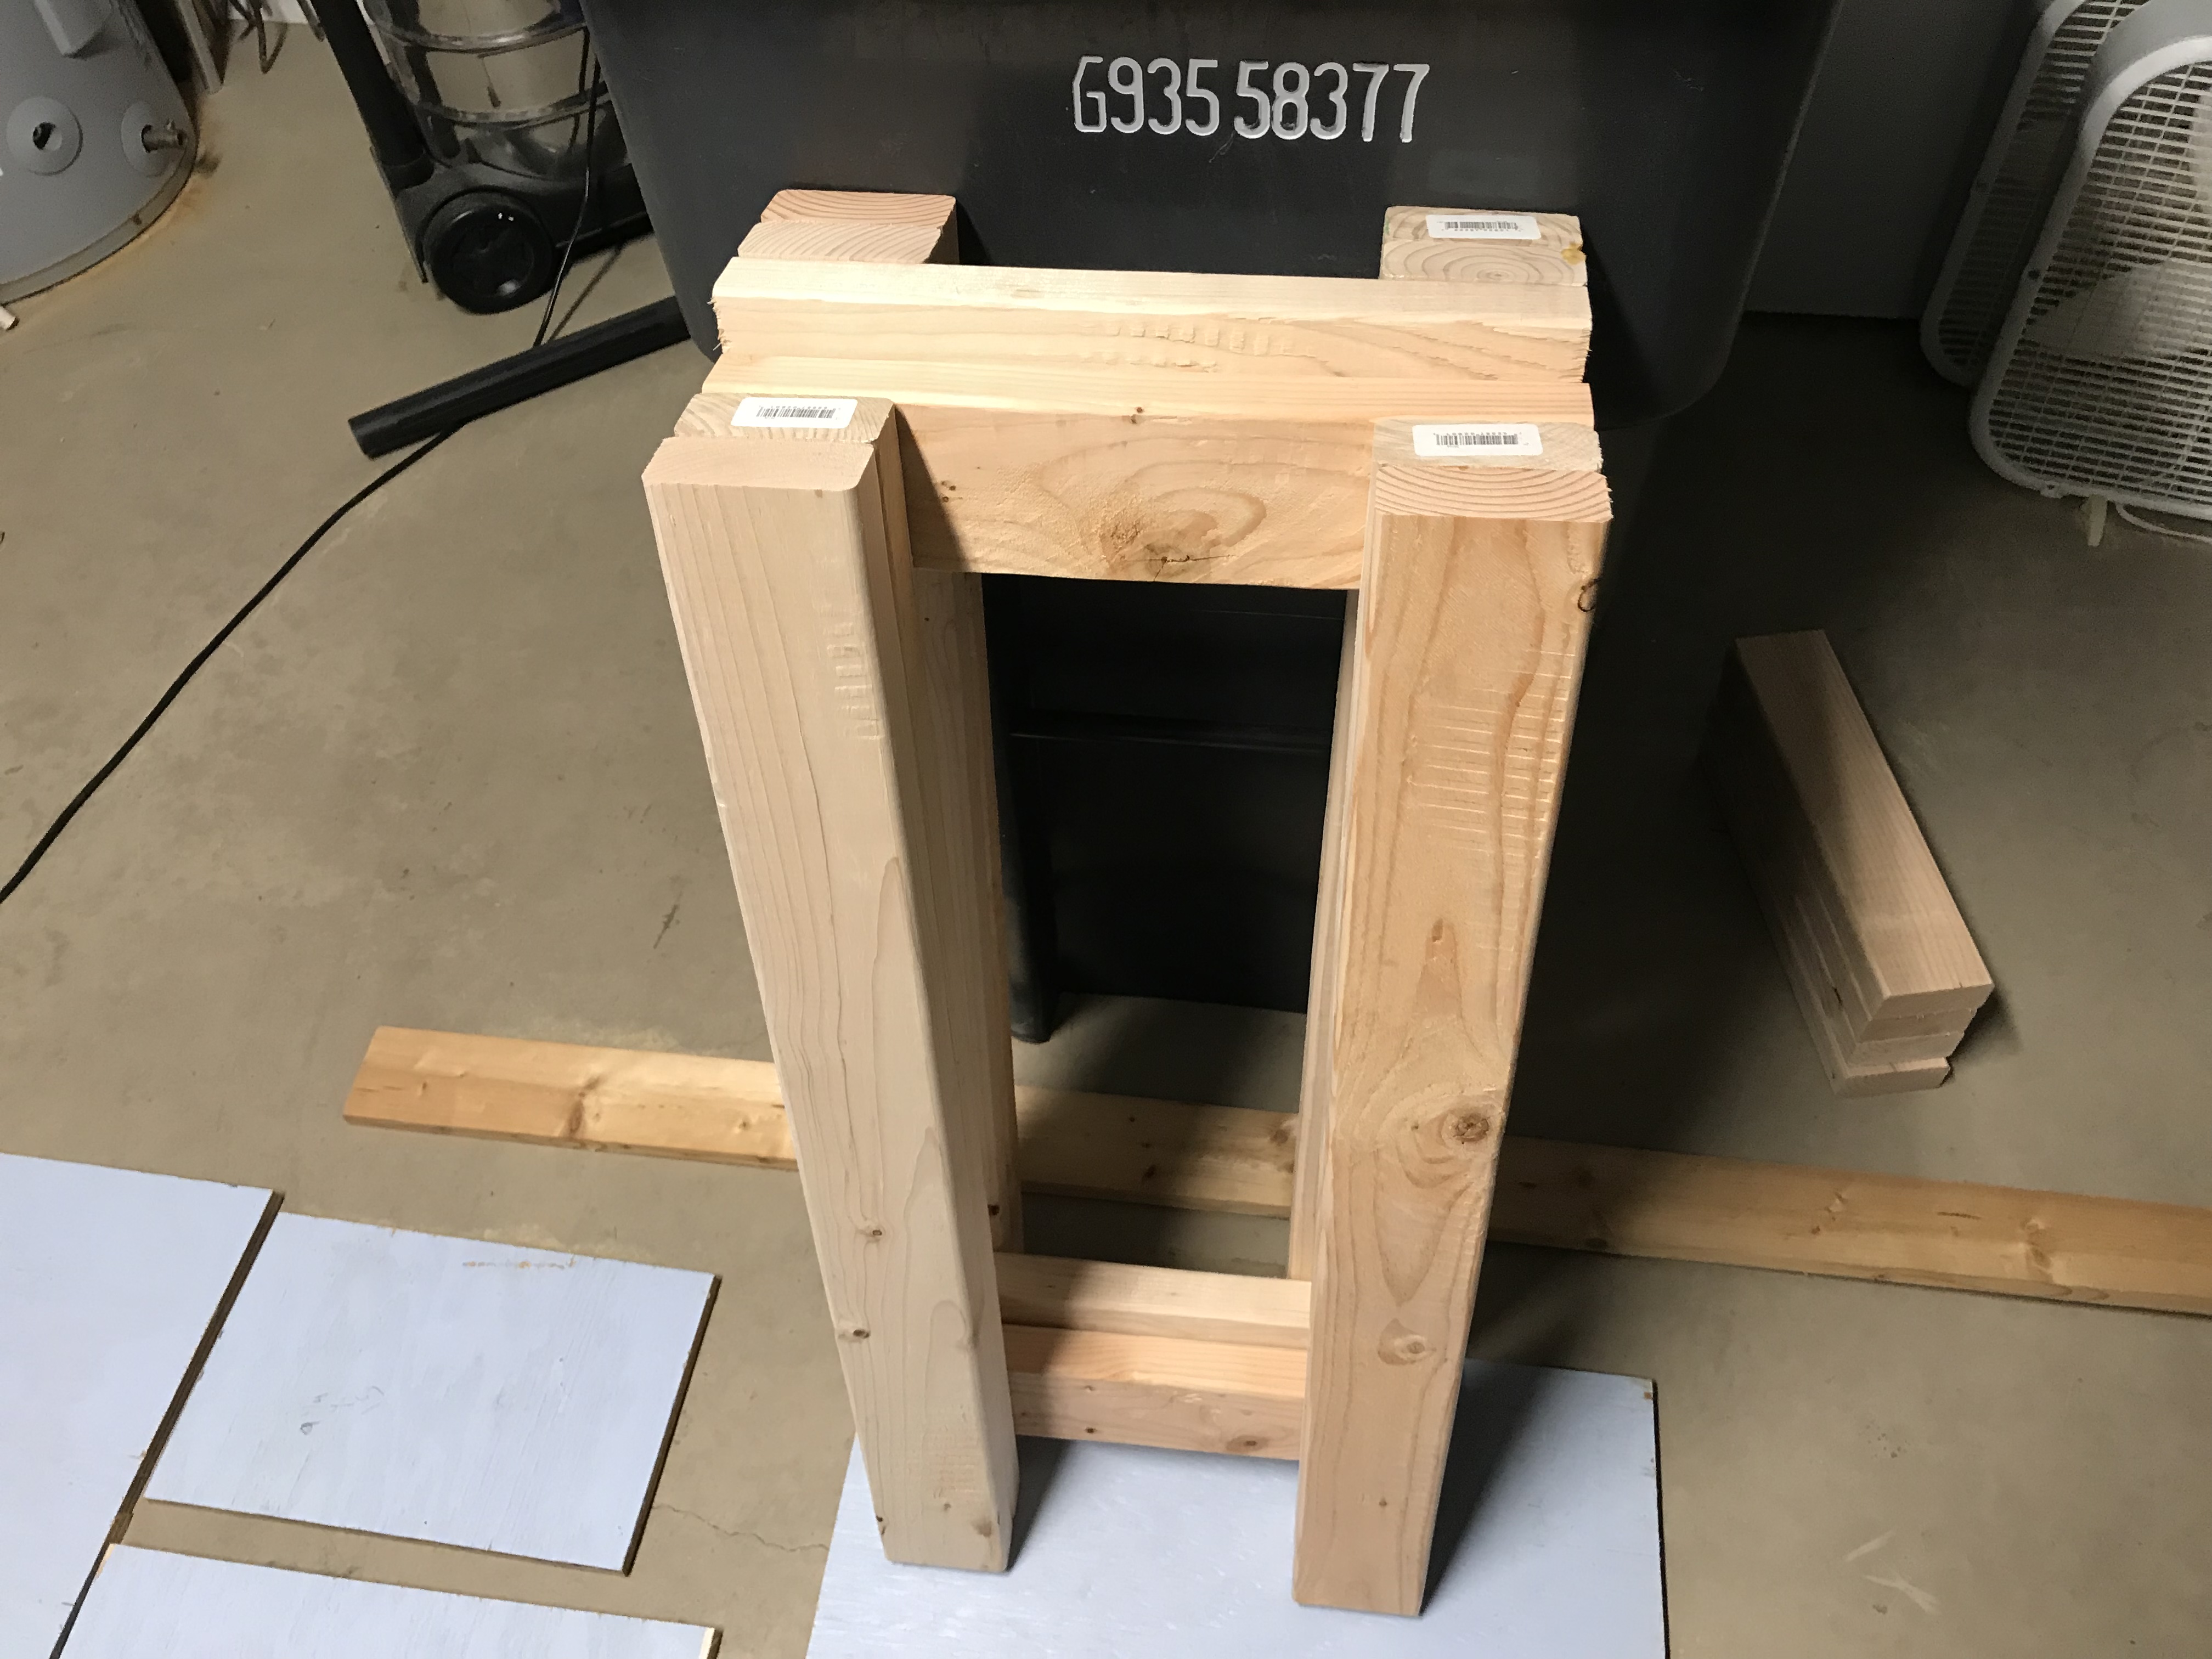
To assemble the legs, I took some 2x4s and glued them together, then put some screws through them.

I spread the glue out, clamped them together, and then put some screws through them.  I have to stop here and brag about one of the really cool Christmas gifts I received this year – a magnetic wristband.  It makes work so much easier and is not very bulky at all.

I made 4 sets of legs, and it was time to move on to the next part:

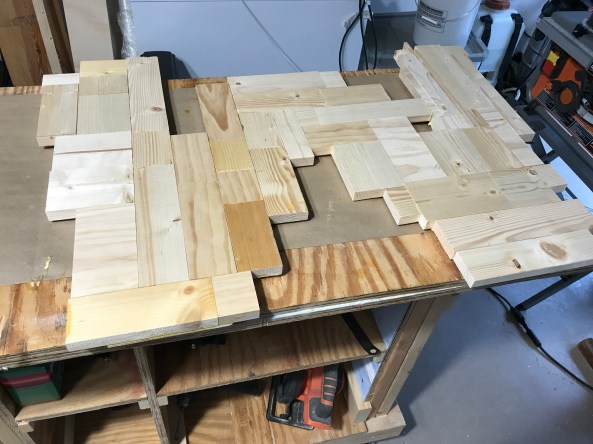
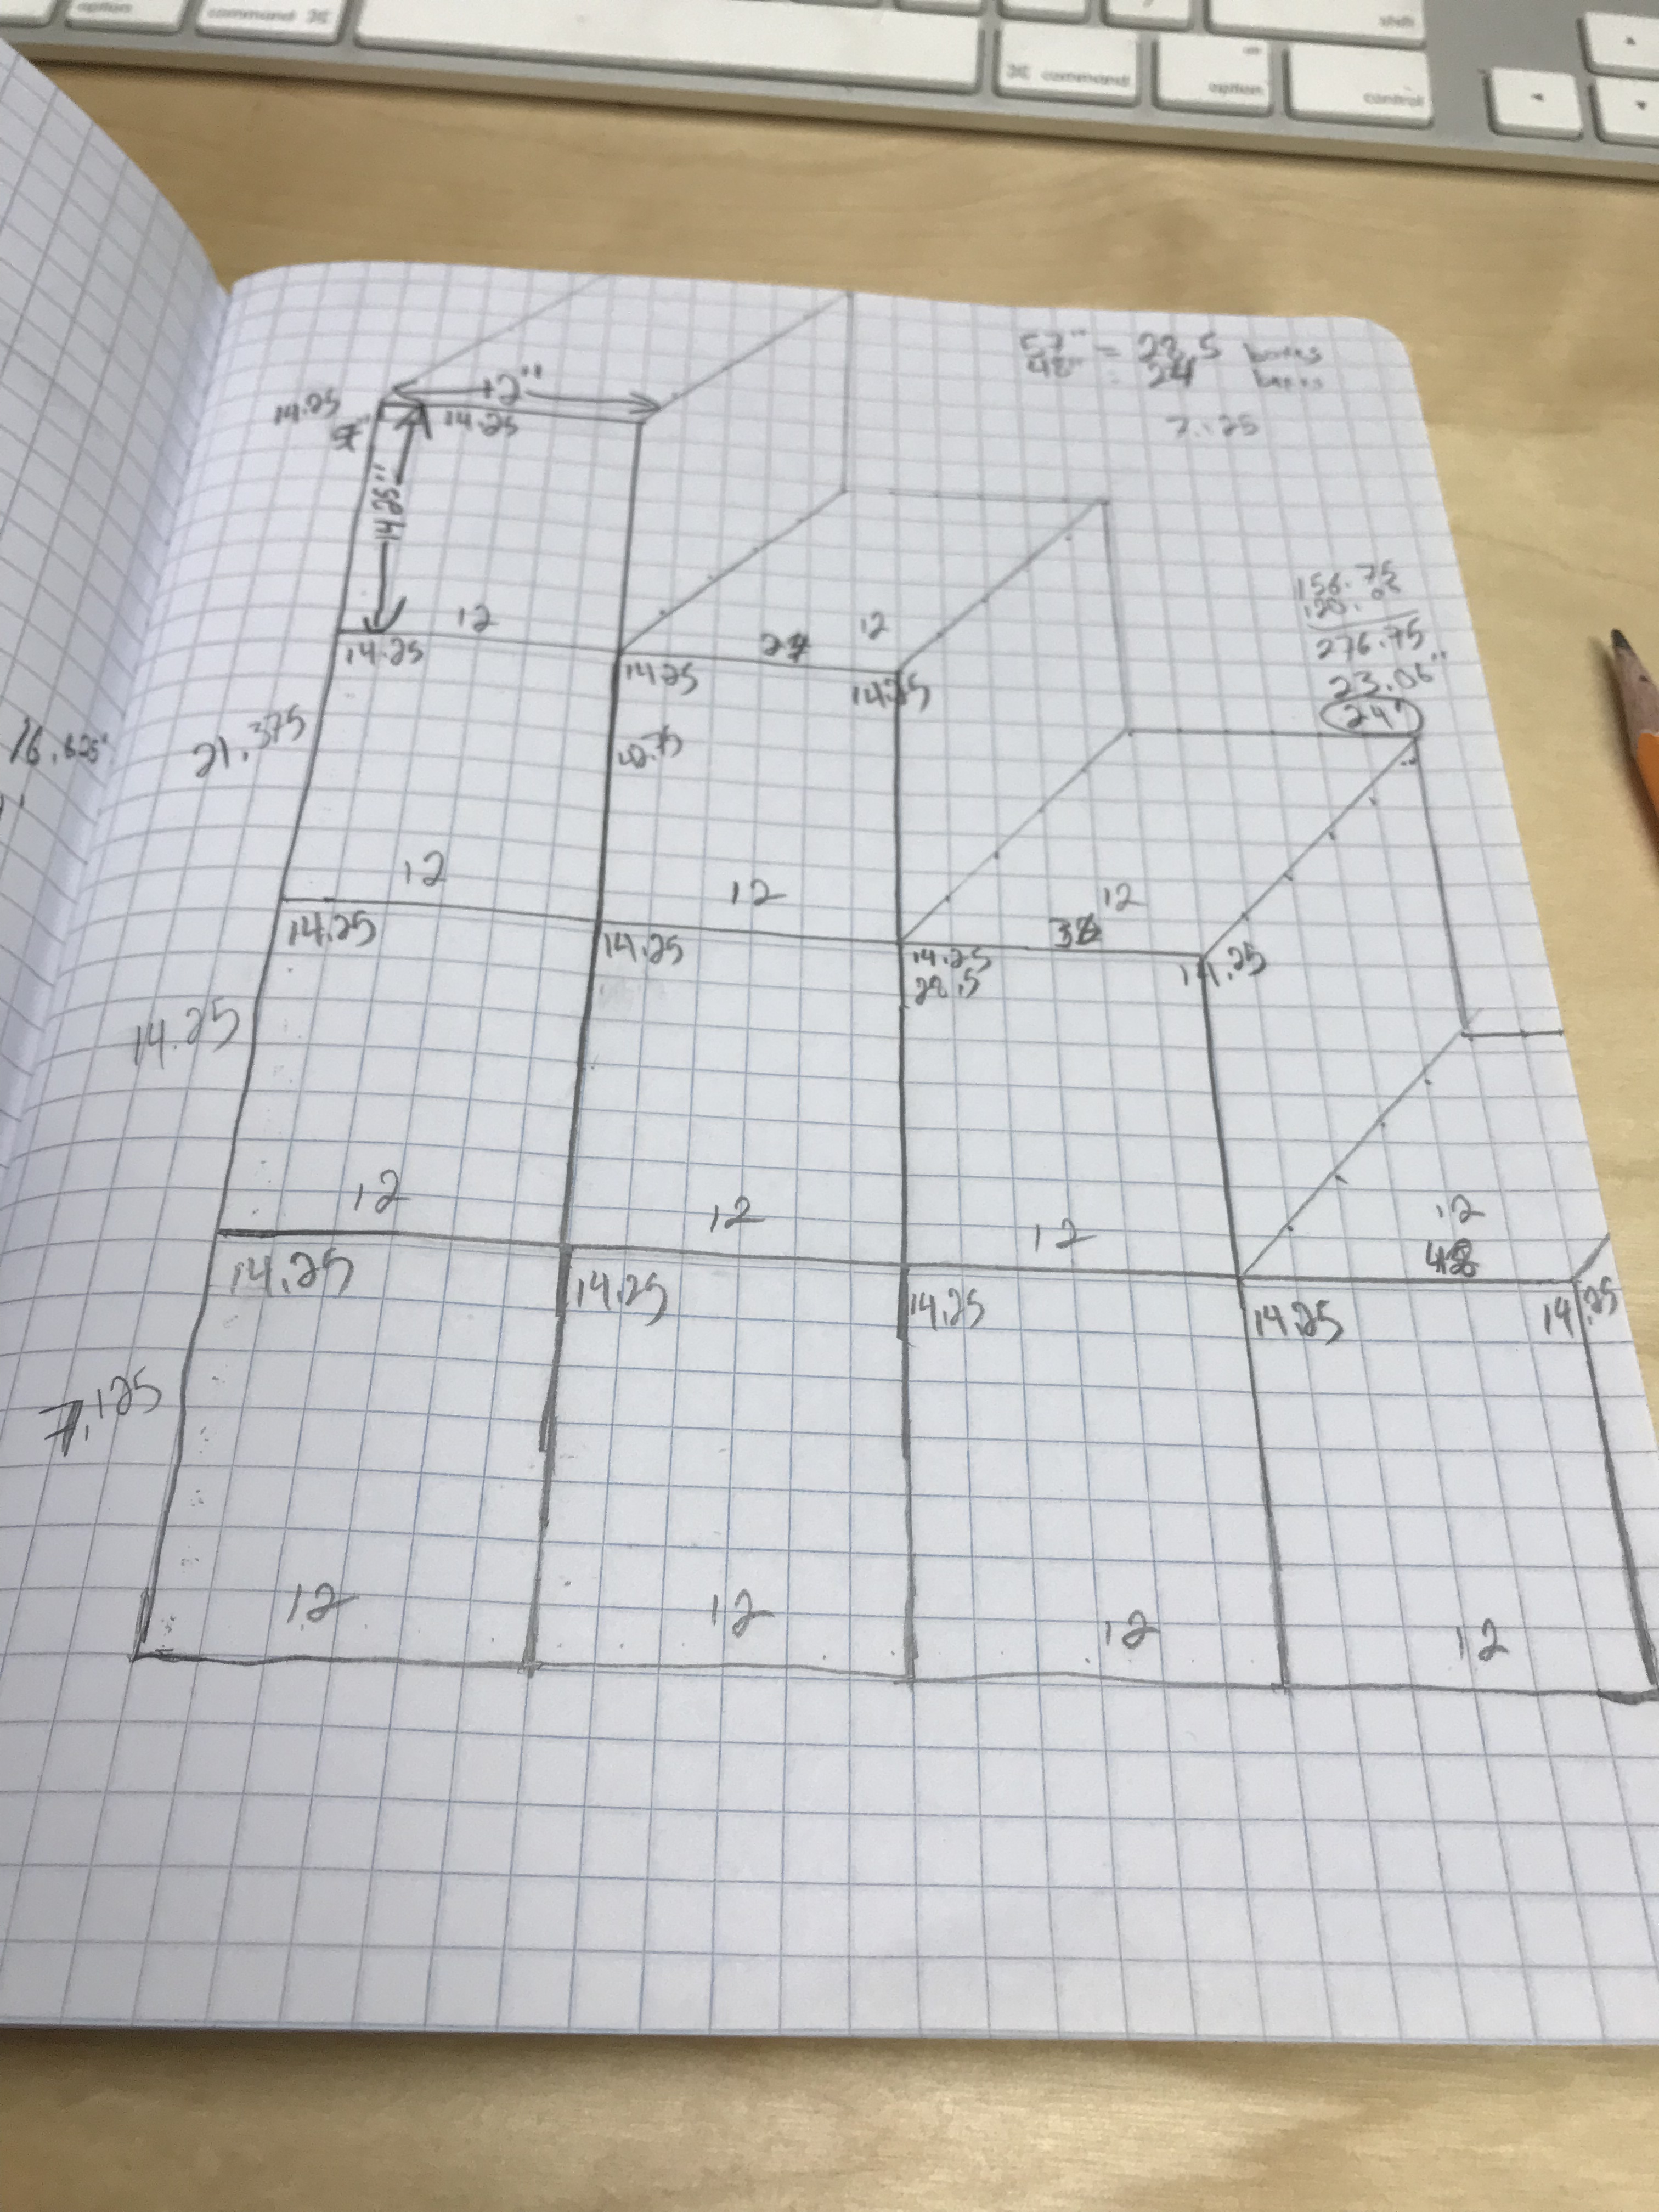
The next part was to start cutting up the pieces that would be used for shelving and surfaces.  I have to admit, I was not looking forward to this.  Back when I built Josie’s loft bed, I had purchased a Black and Decker circular saw that was battery operated.  I thought it would make things a lot easier.  I bought Black and Decker because I already had an investment in the Black and Decker family, and I have 4 of their 20-volt batteries.

What I discovered, sadly, was that the Black and Decker battery powered circular saw was simply not a good tool.  It cuts slow, loses power quickly, and would often stop and bind up due to lack of power.  So I went and bought me a new corded circular saw – a Ryobi, with laser guidance.  It made a HUGE difference.  I know there are better, more powerful saws out there, but for $40 – you can’t go wrong.

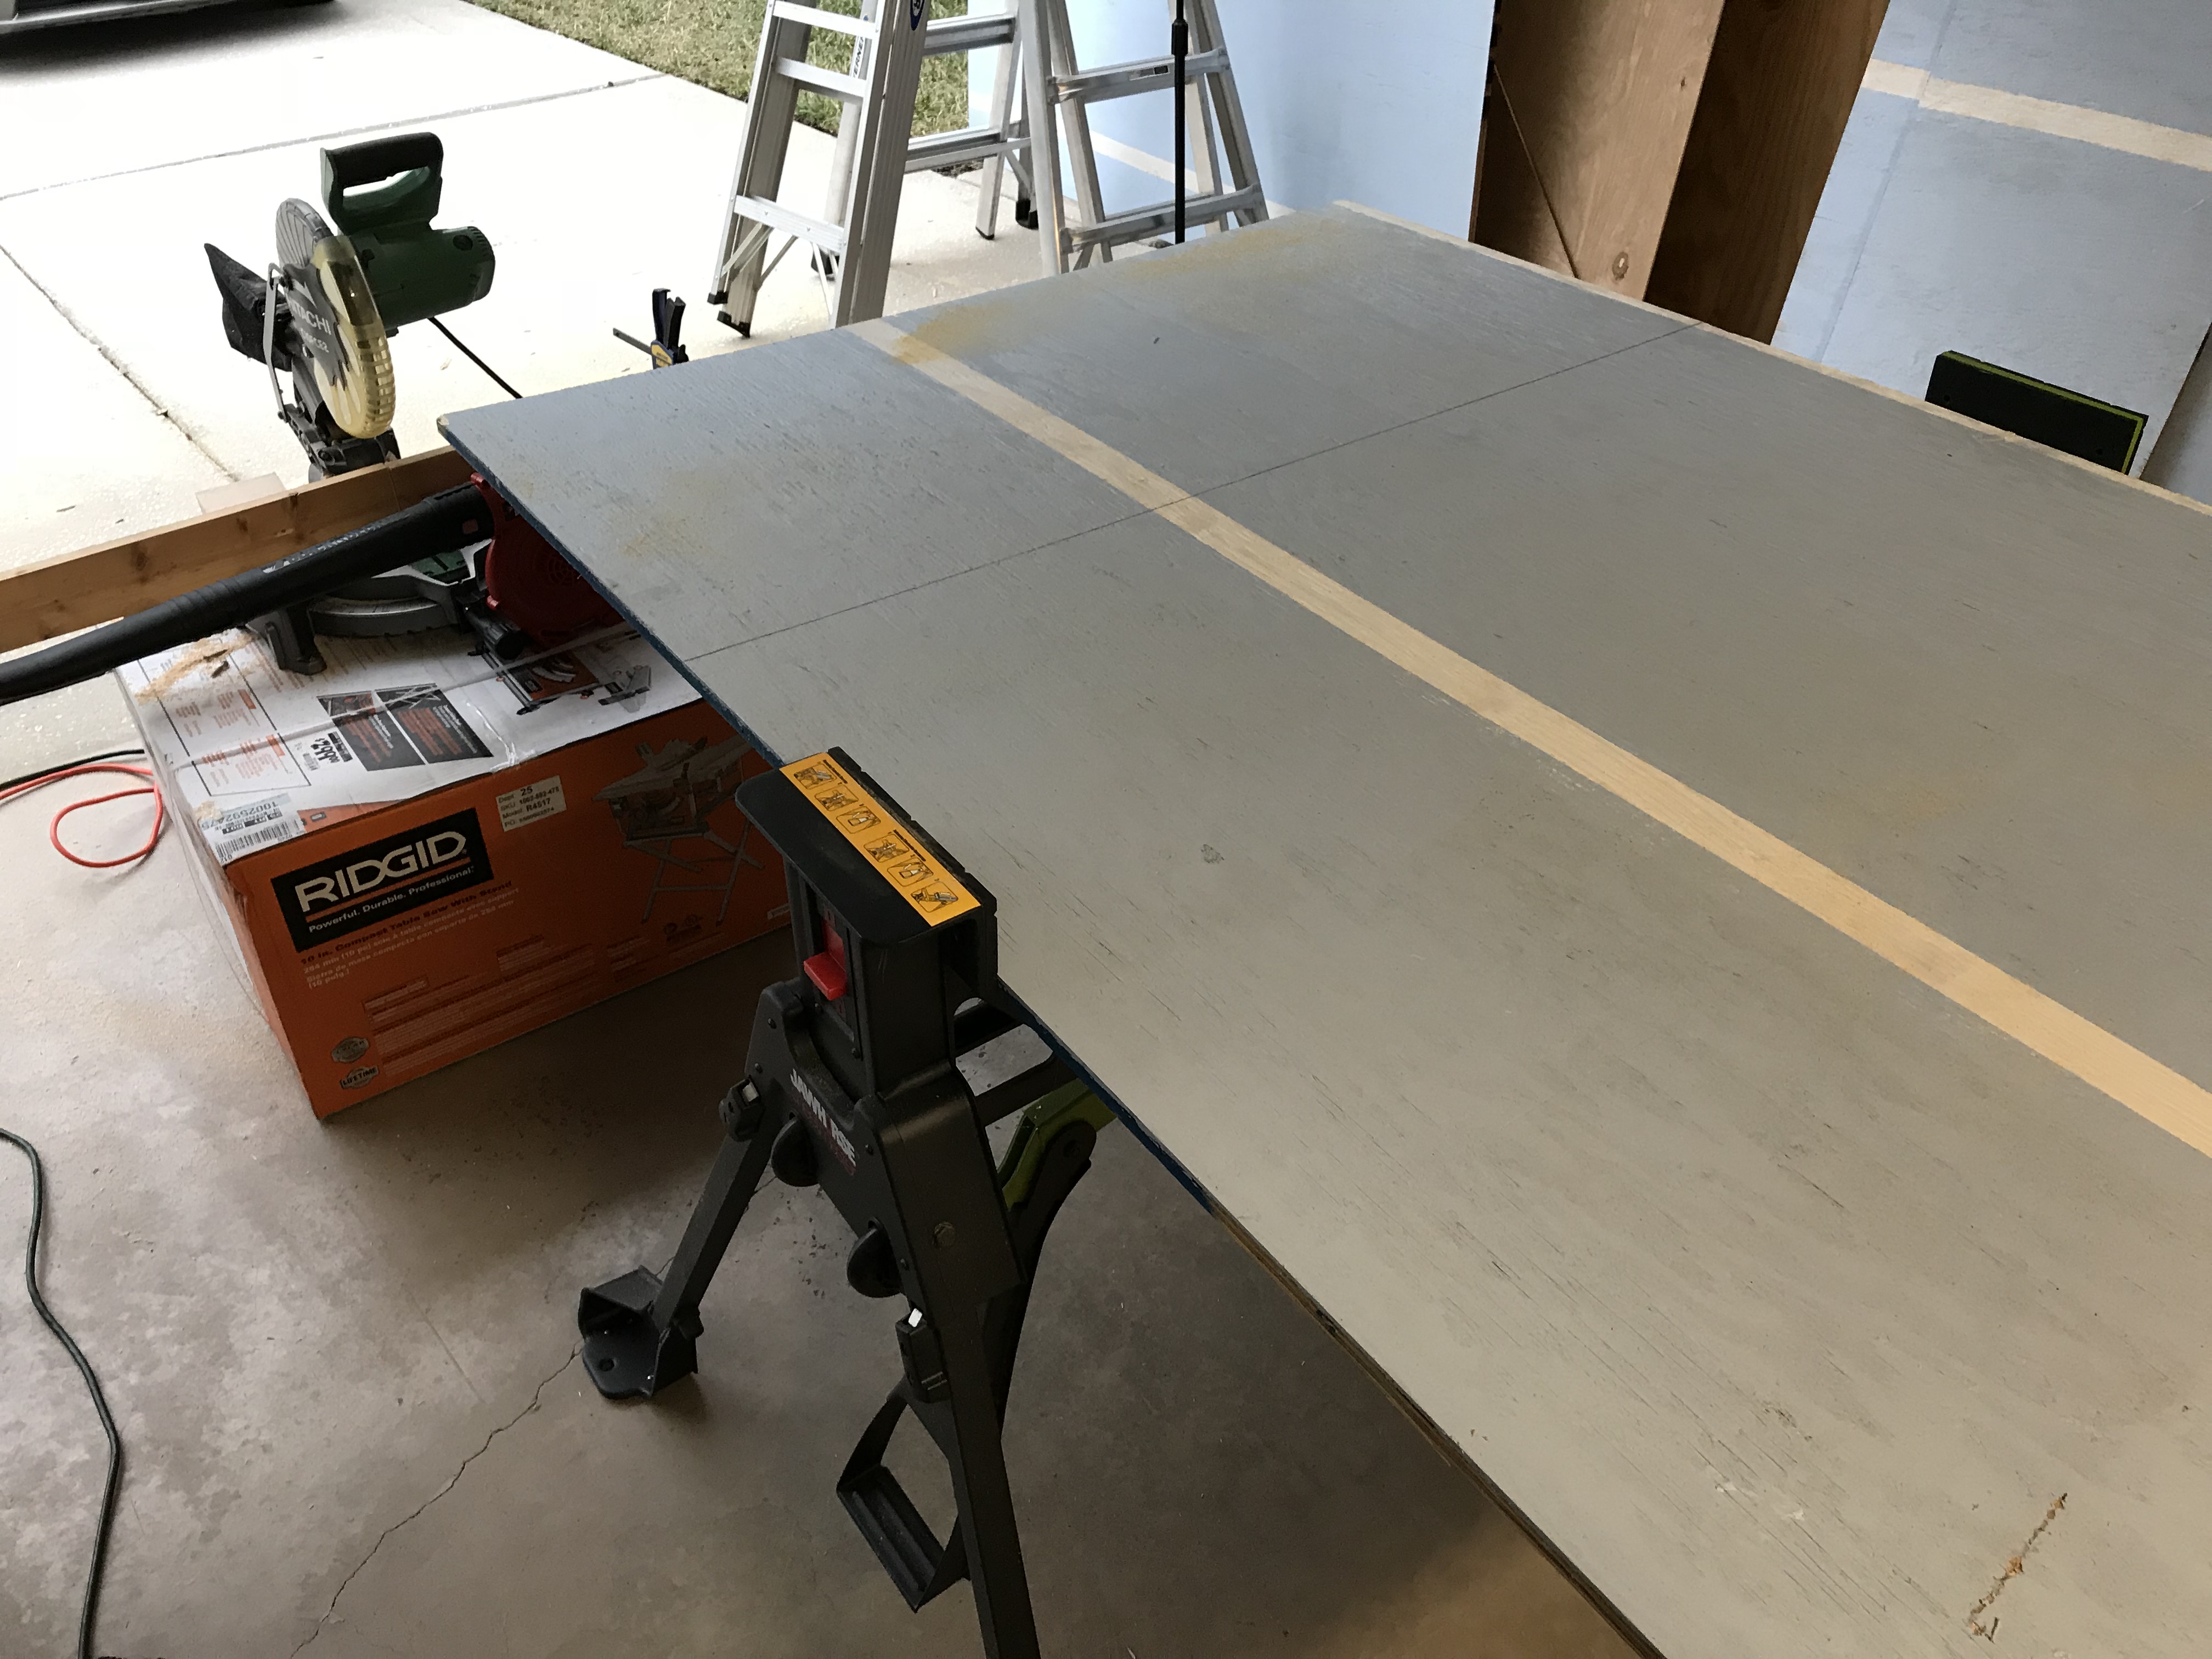
I set my discarded hurricane boards up in my Rockwell JawHorse, which I still think is one of the best investments you can make.

A few minutes later, I had made all my cuts needed for shelving and surfaces:

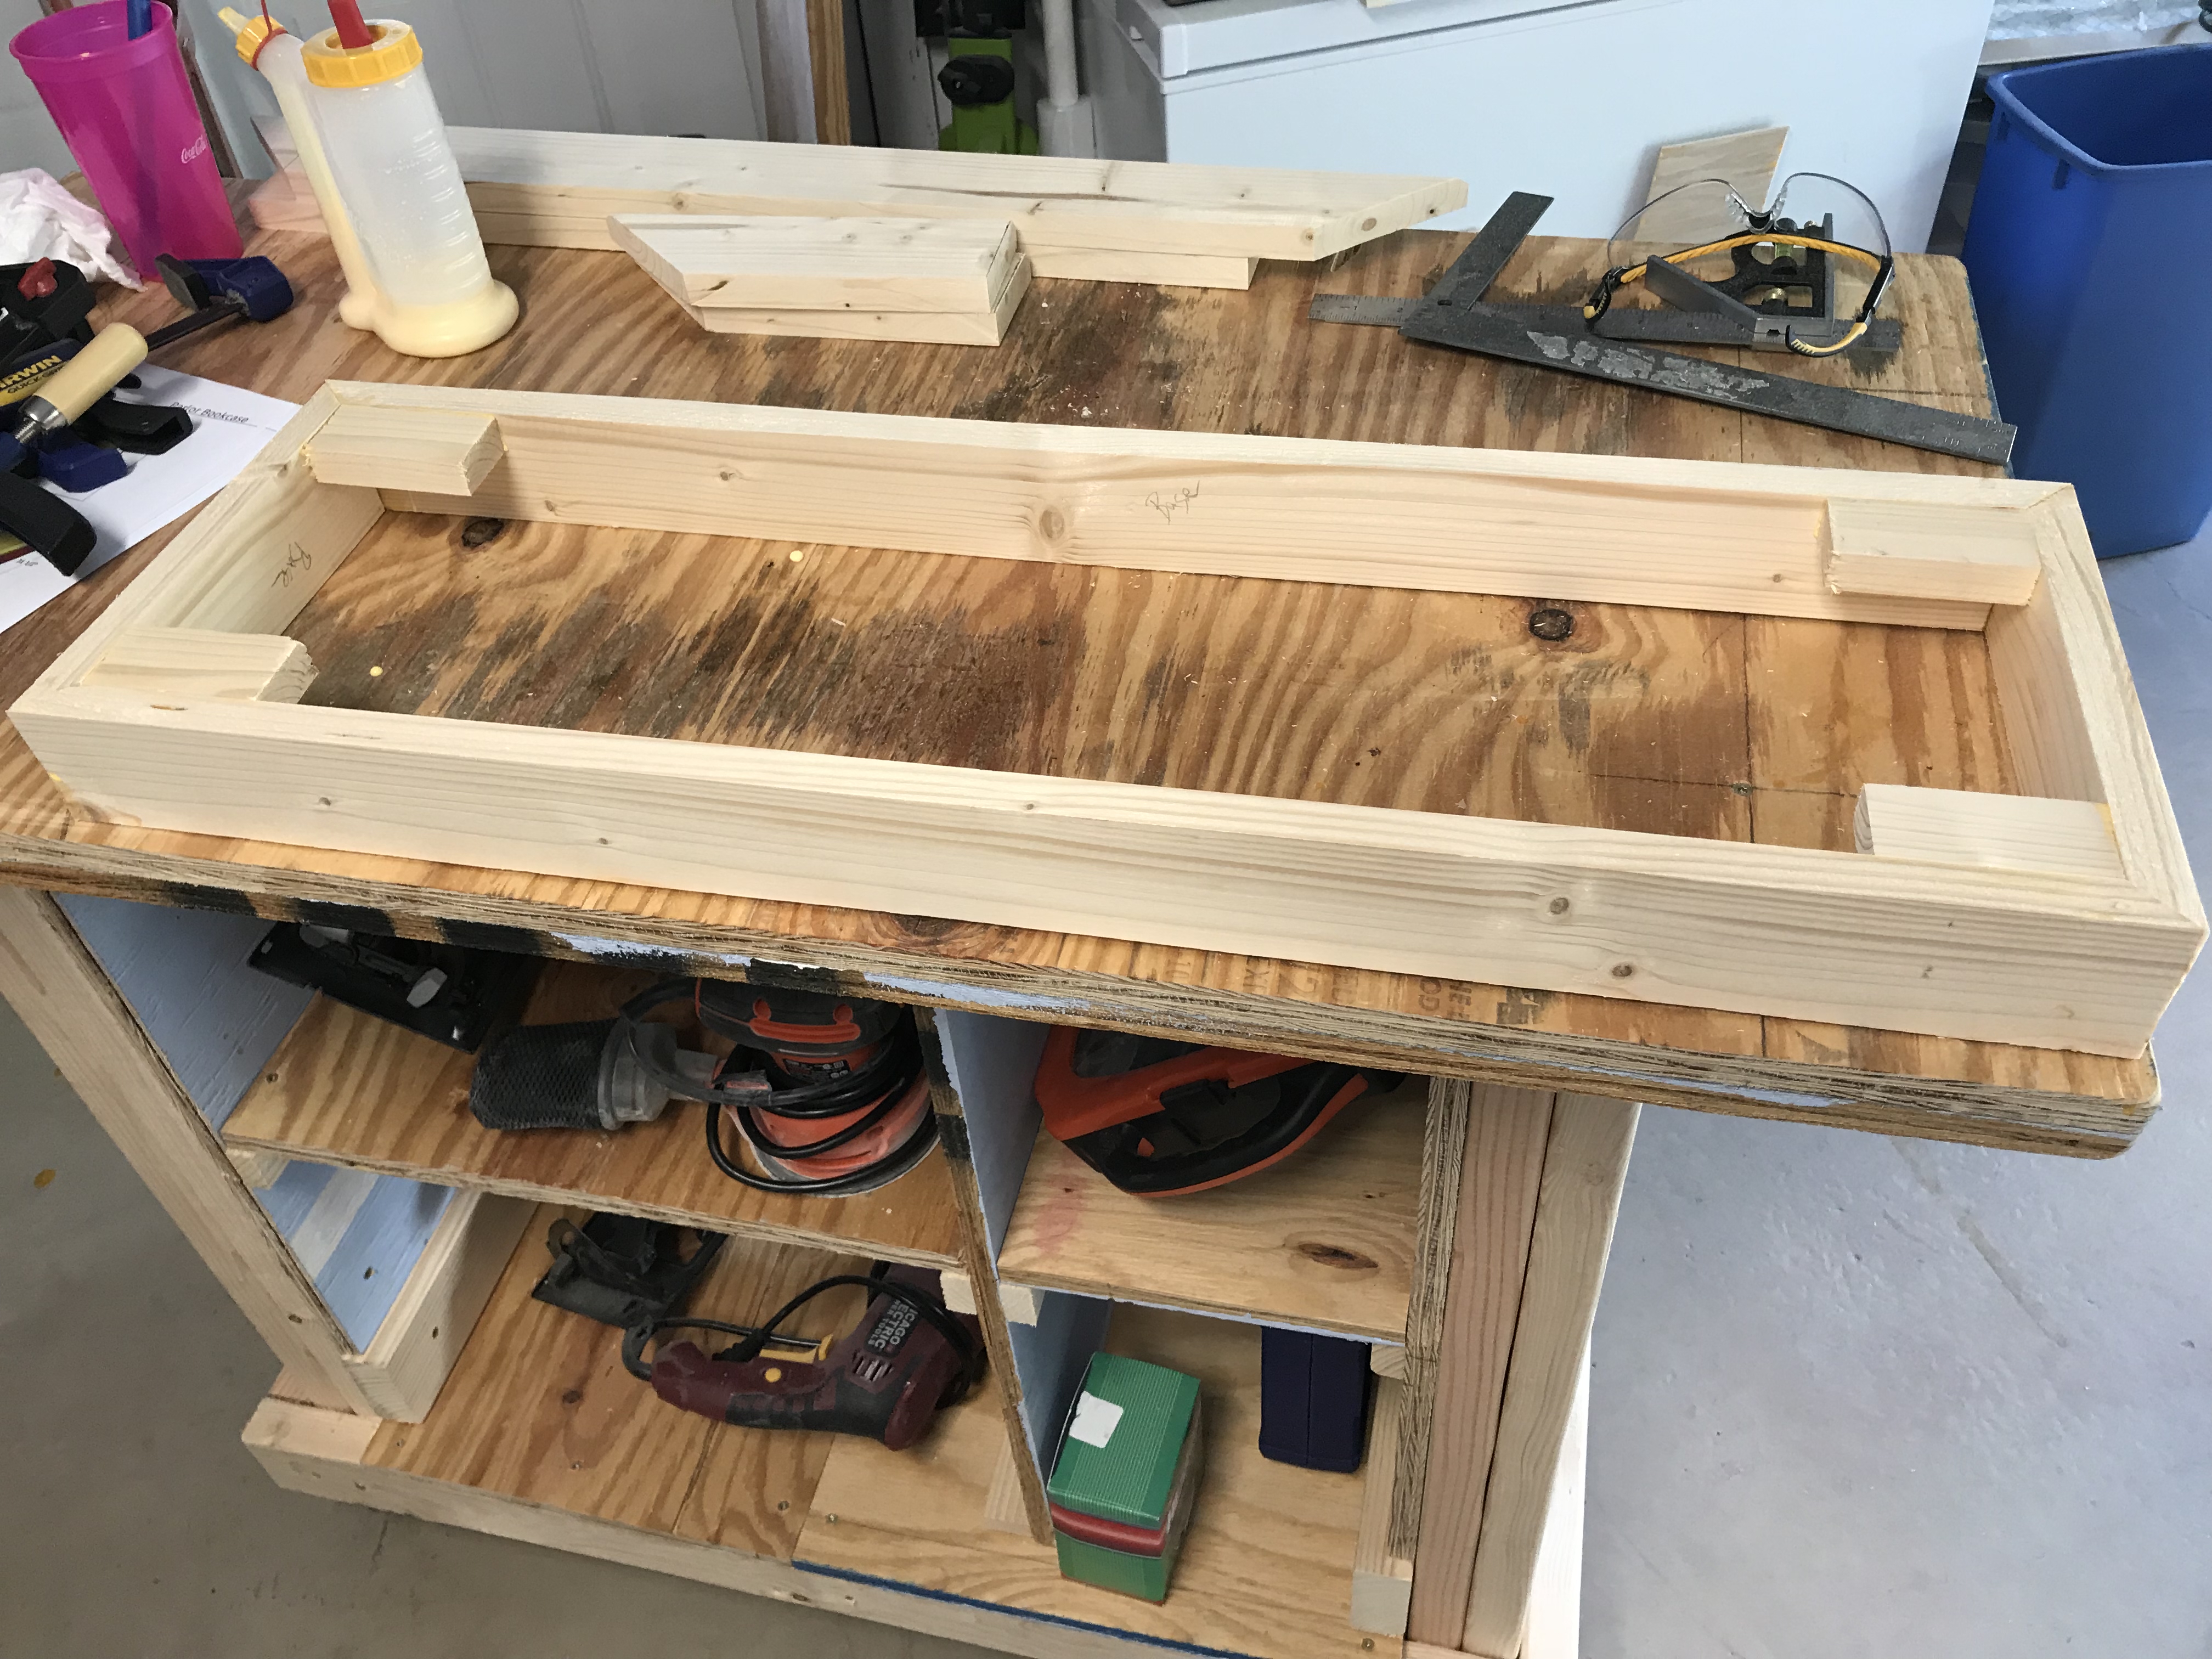
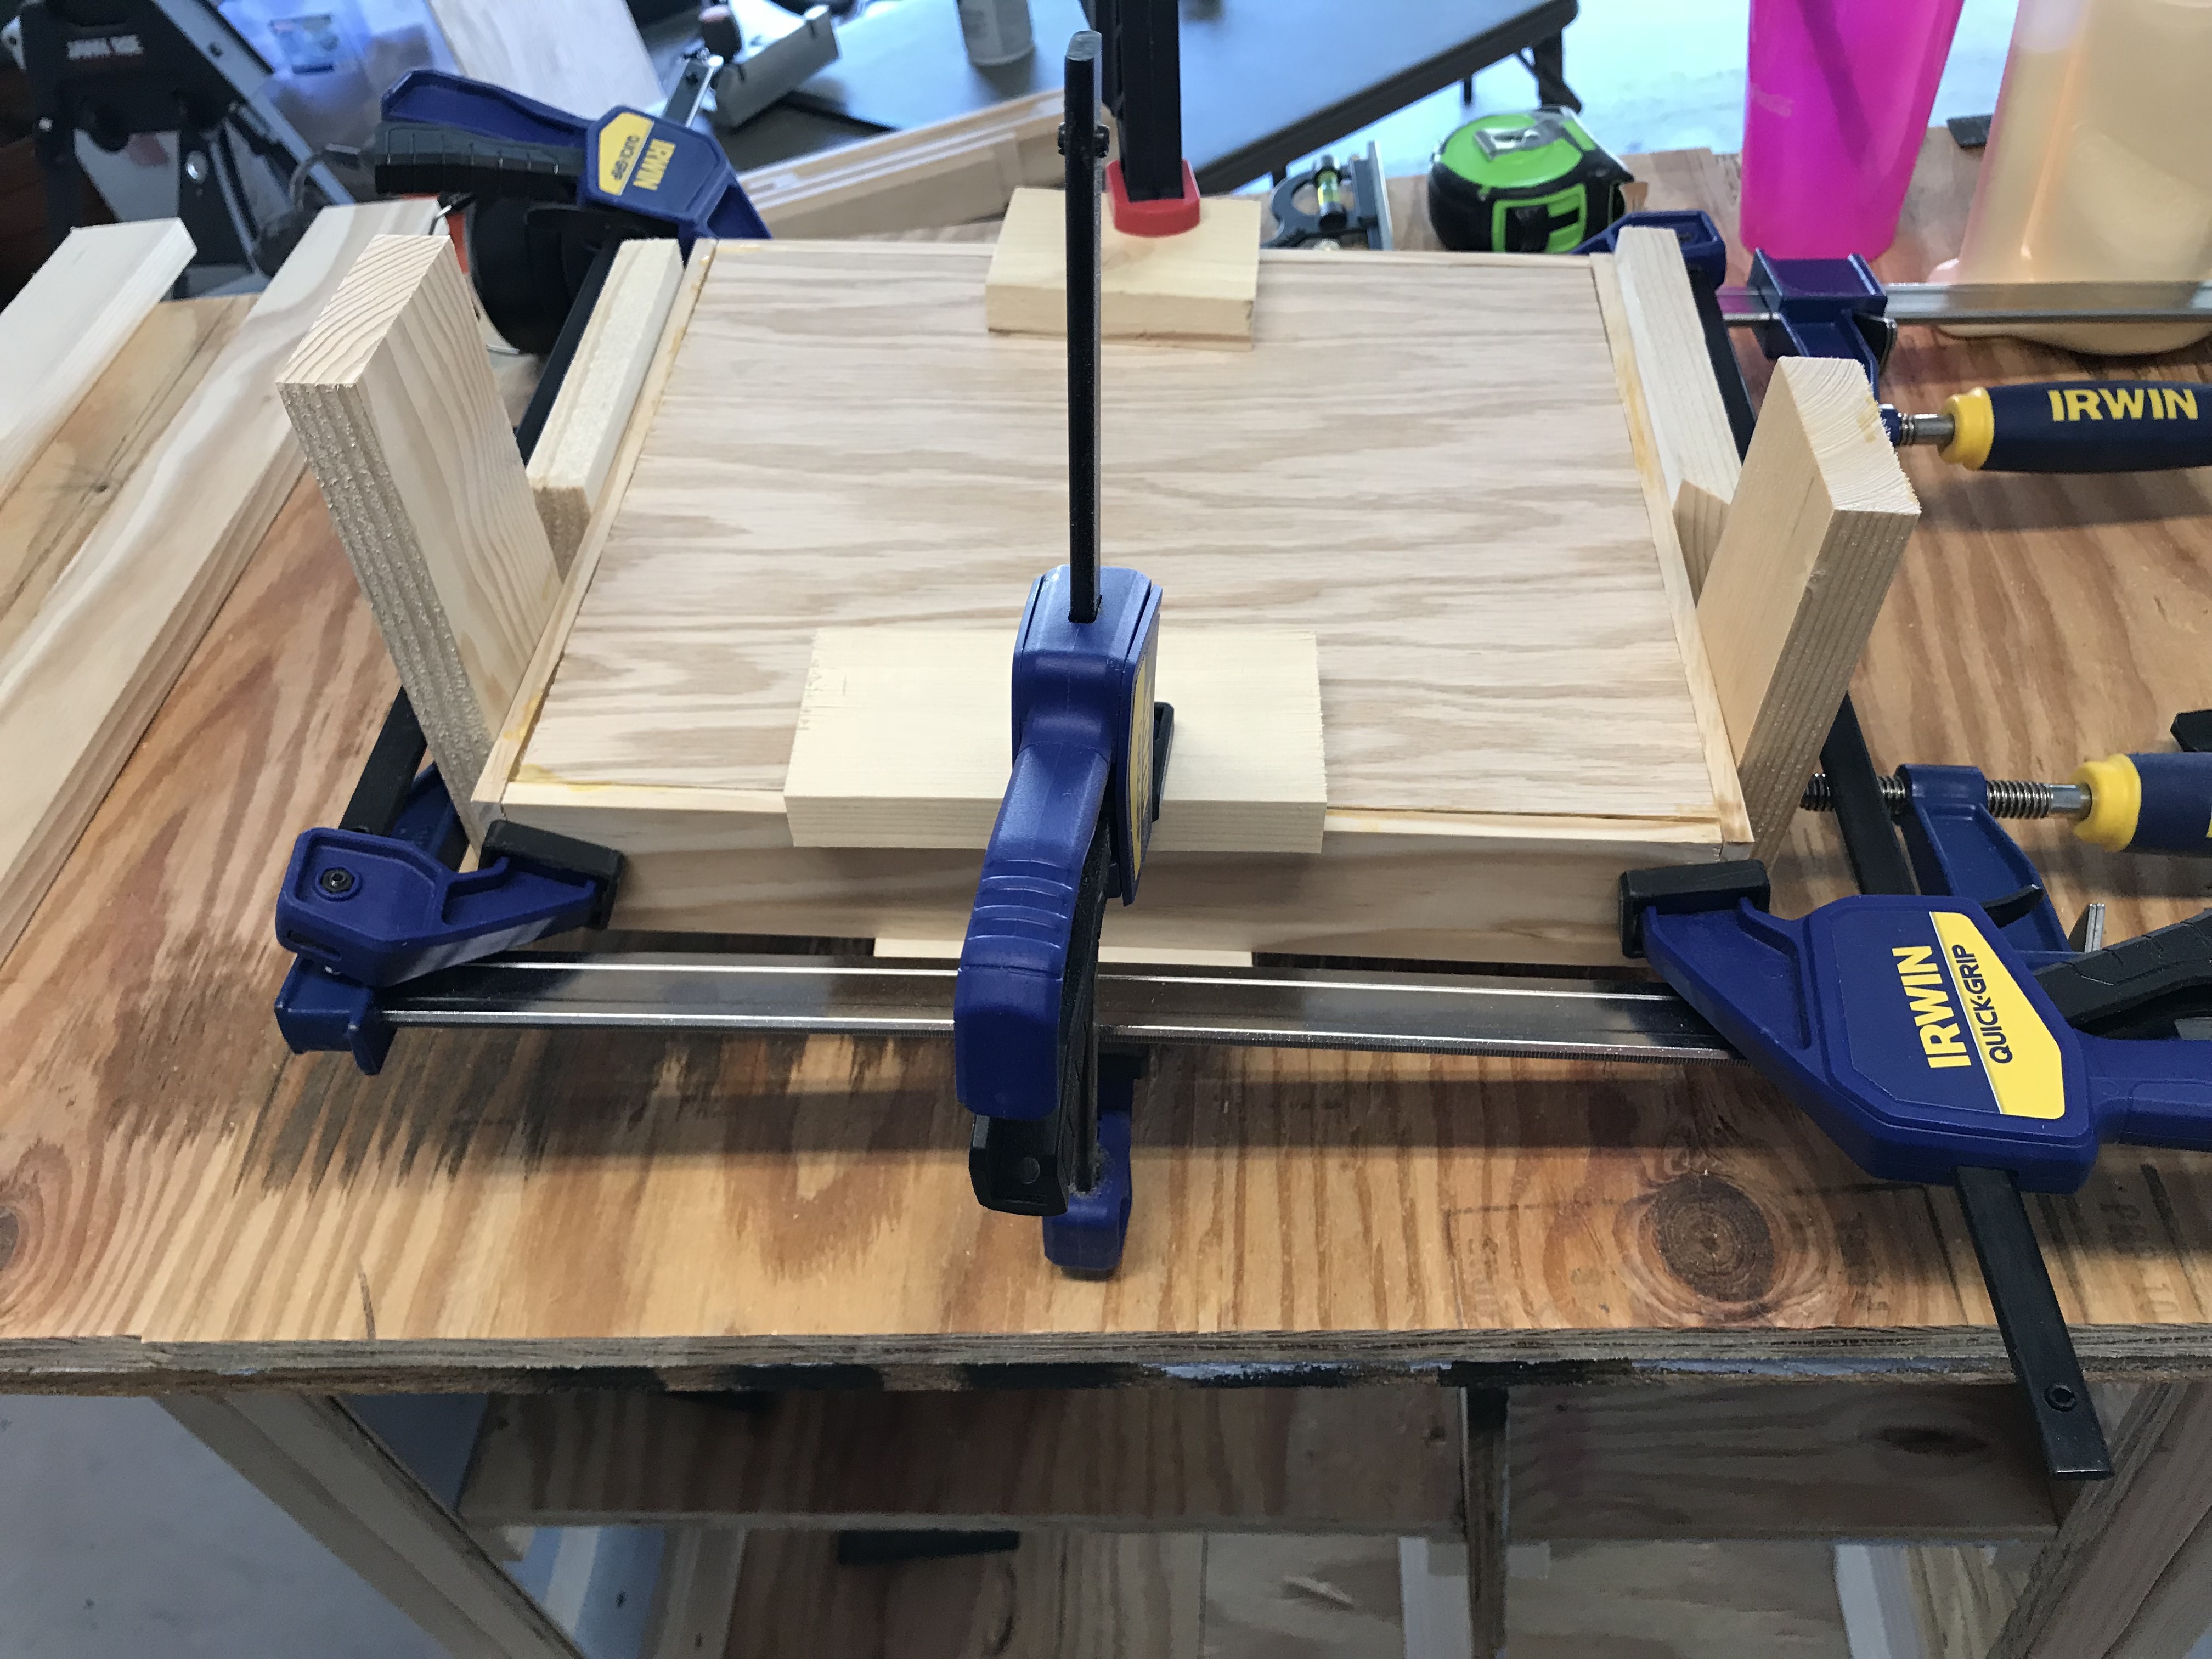
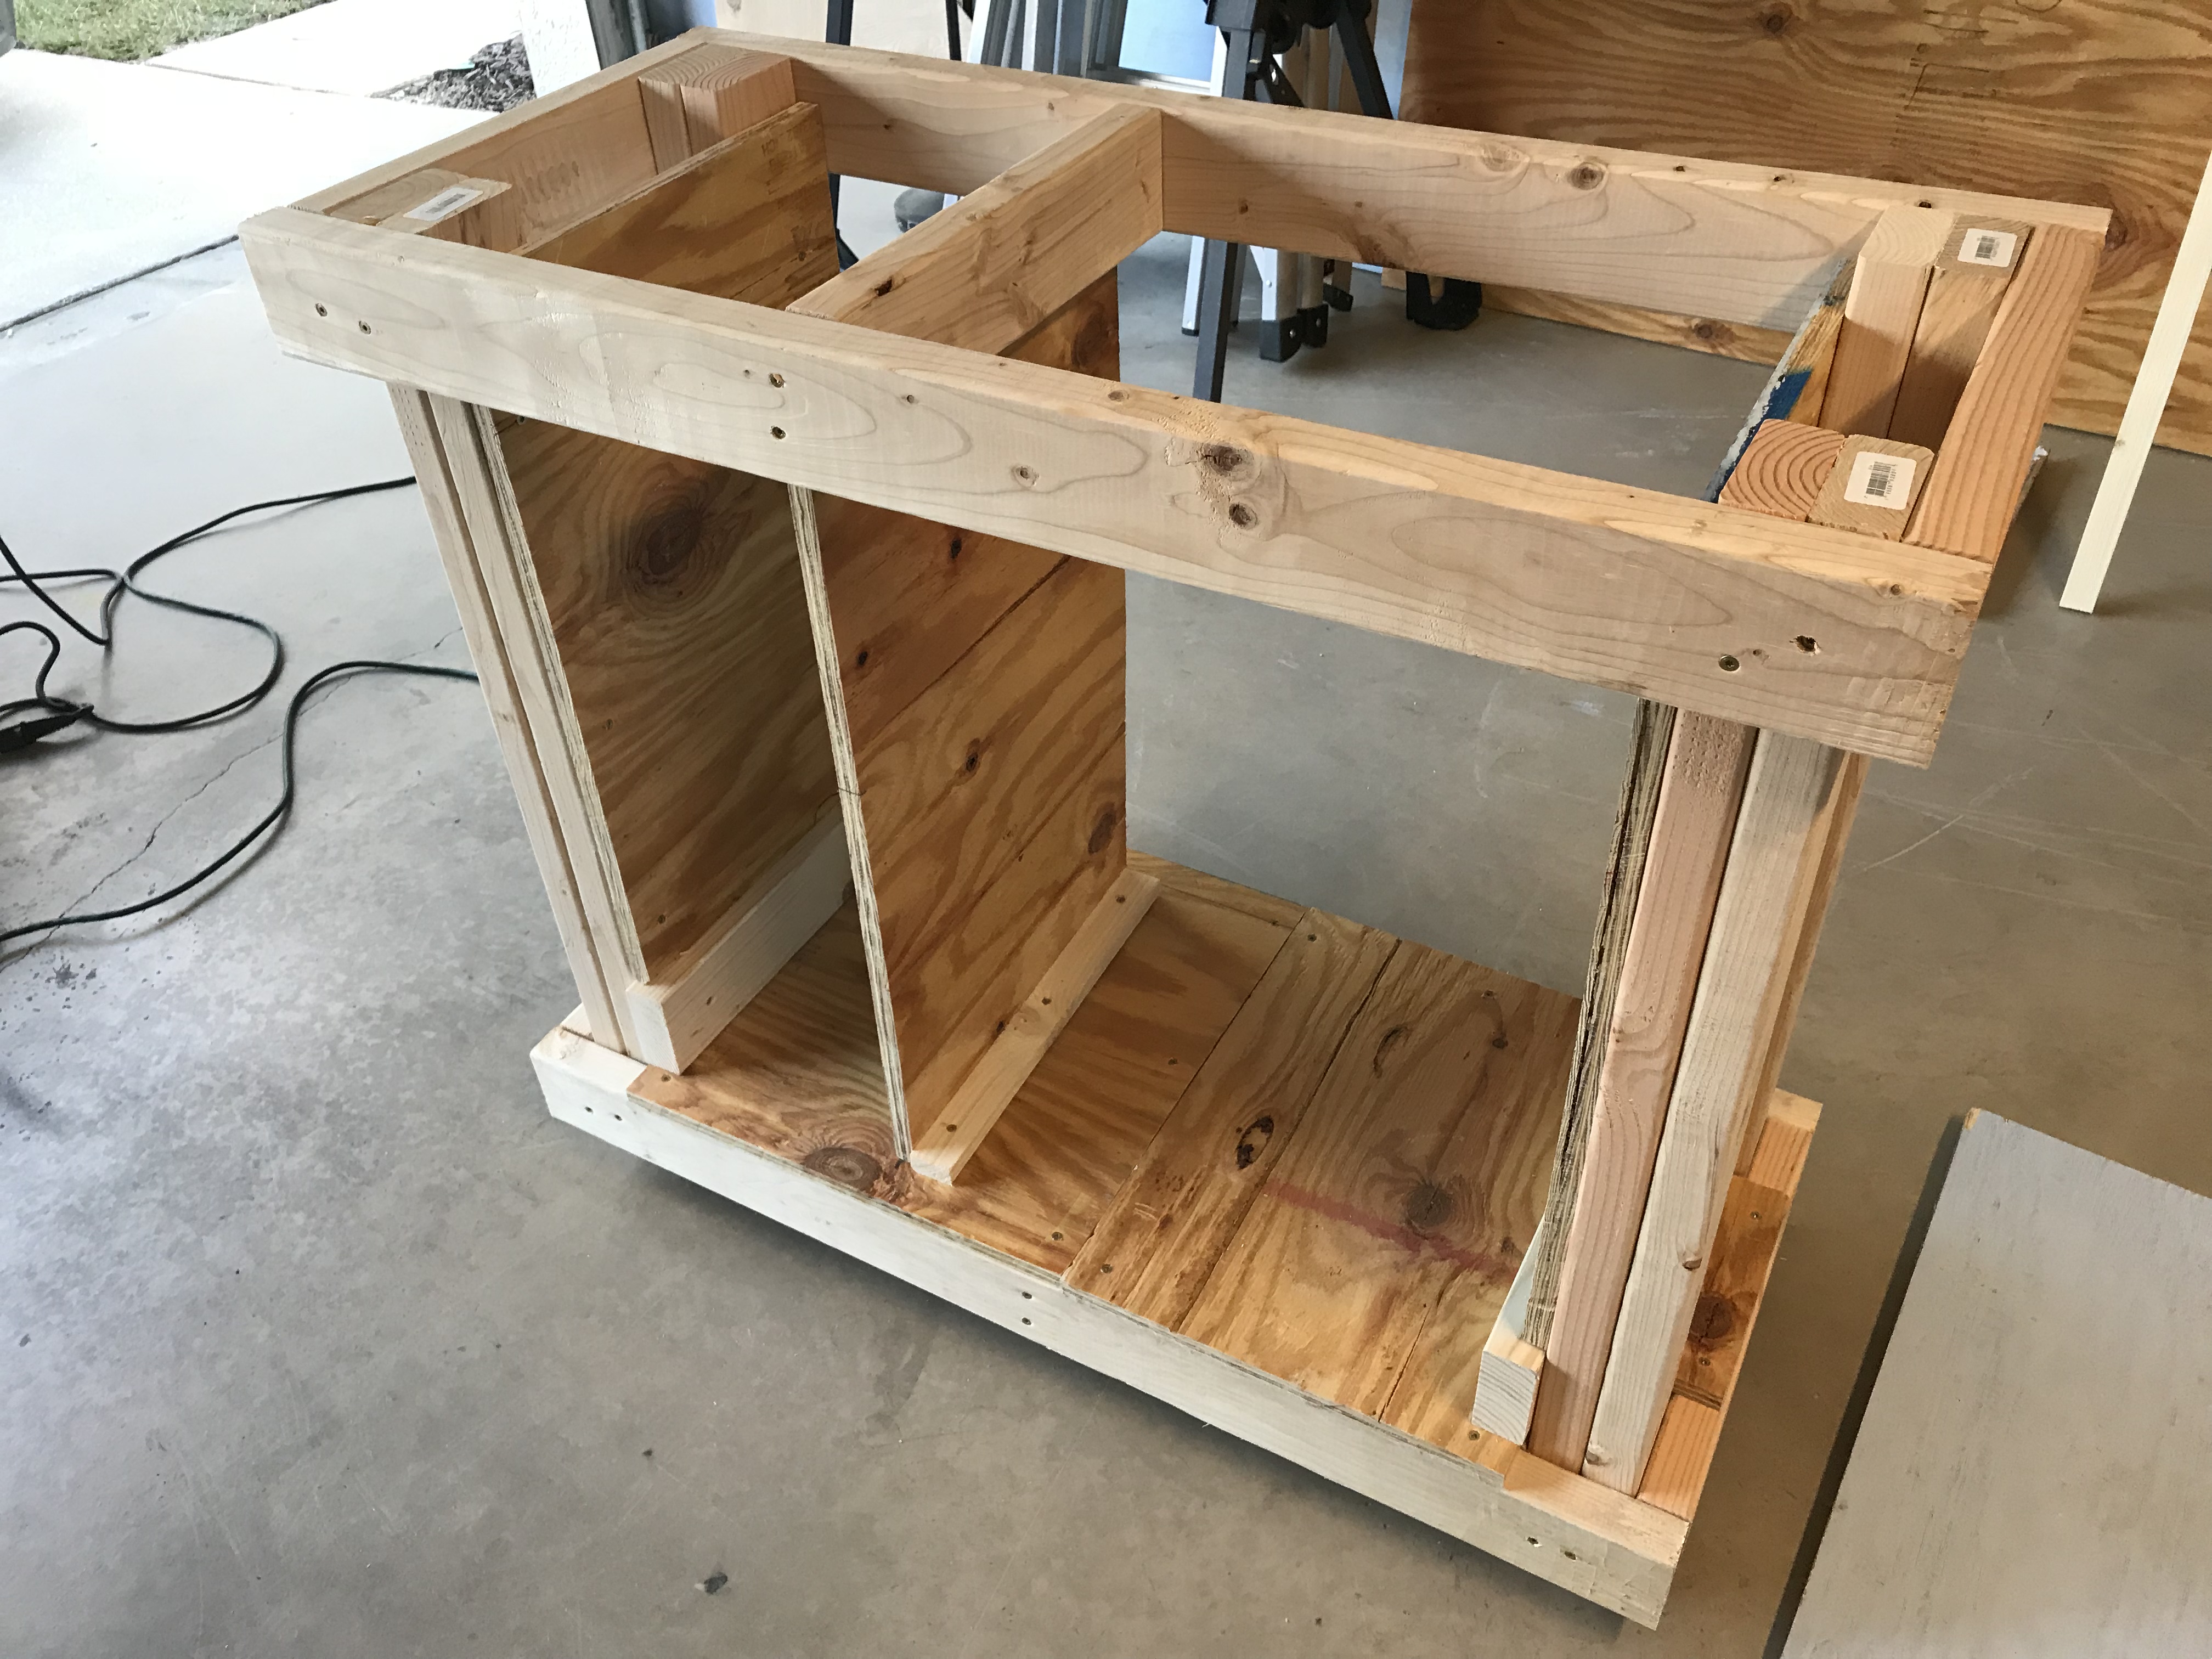
Next, I started to build the frame for the bench:

I used the top of another plywood sheet in my Rockwell JawHorse for a workstation to make it easier for me to do the work.

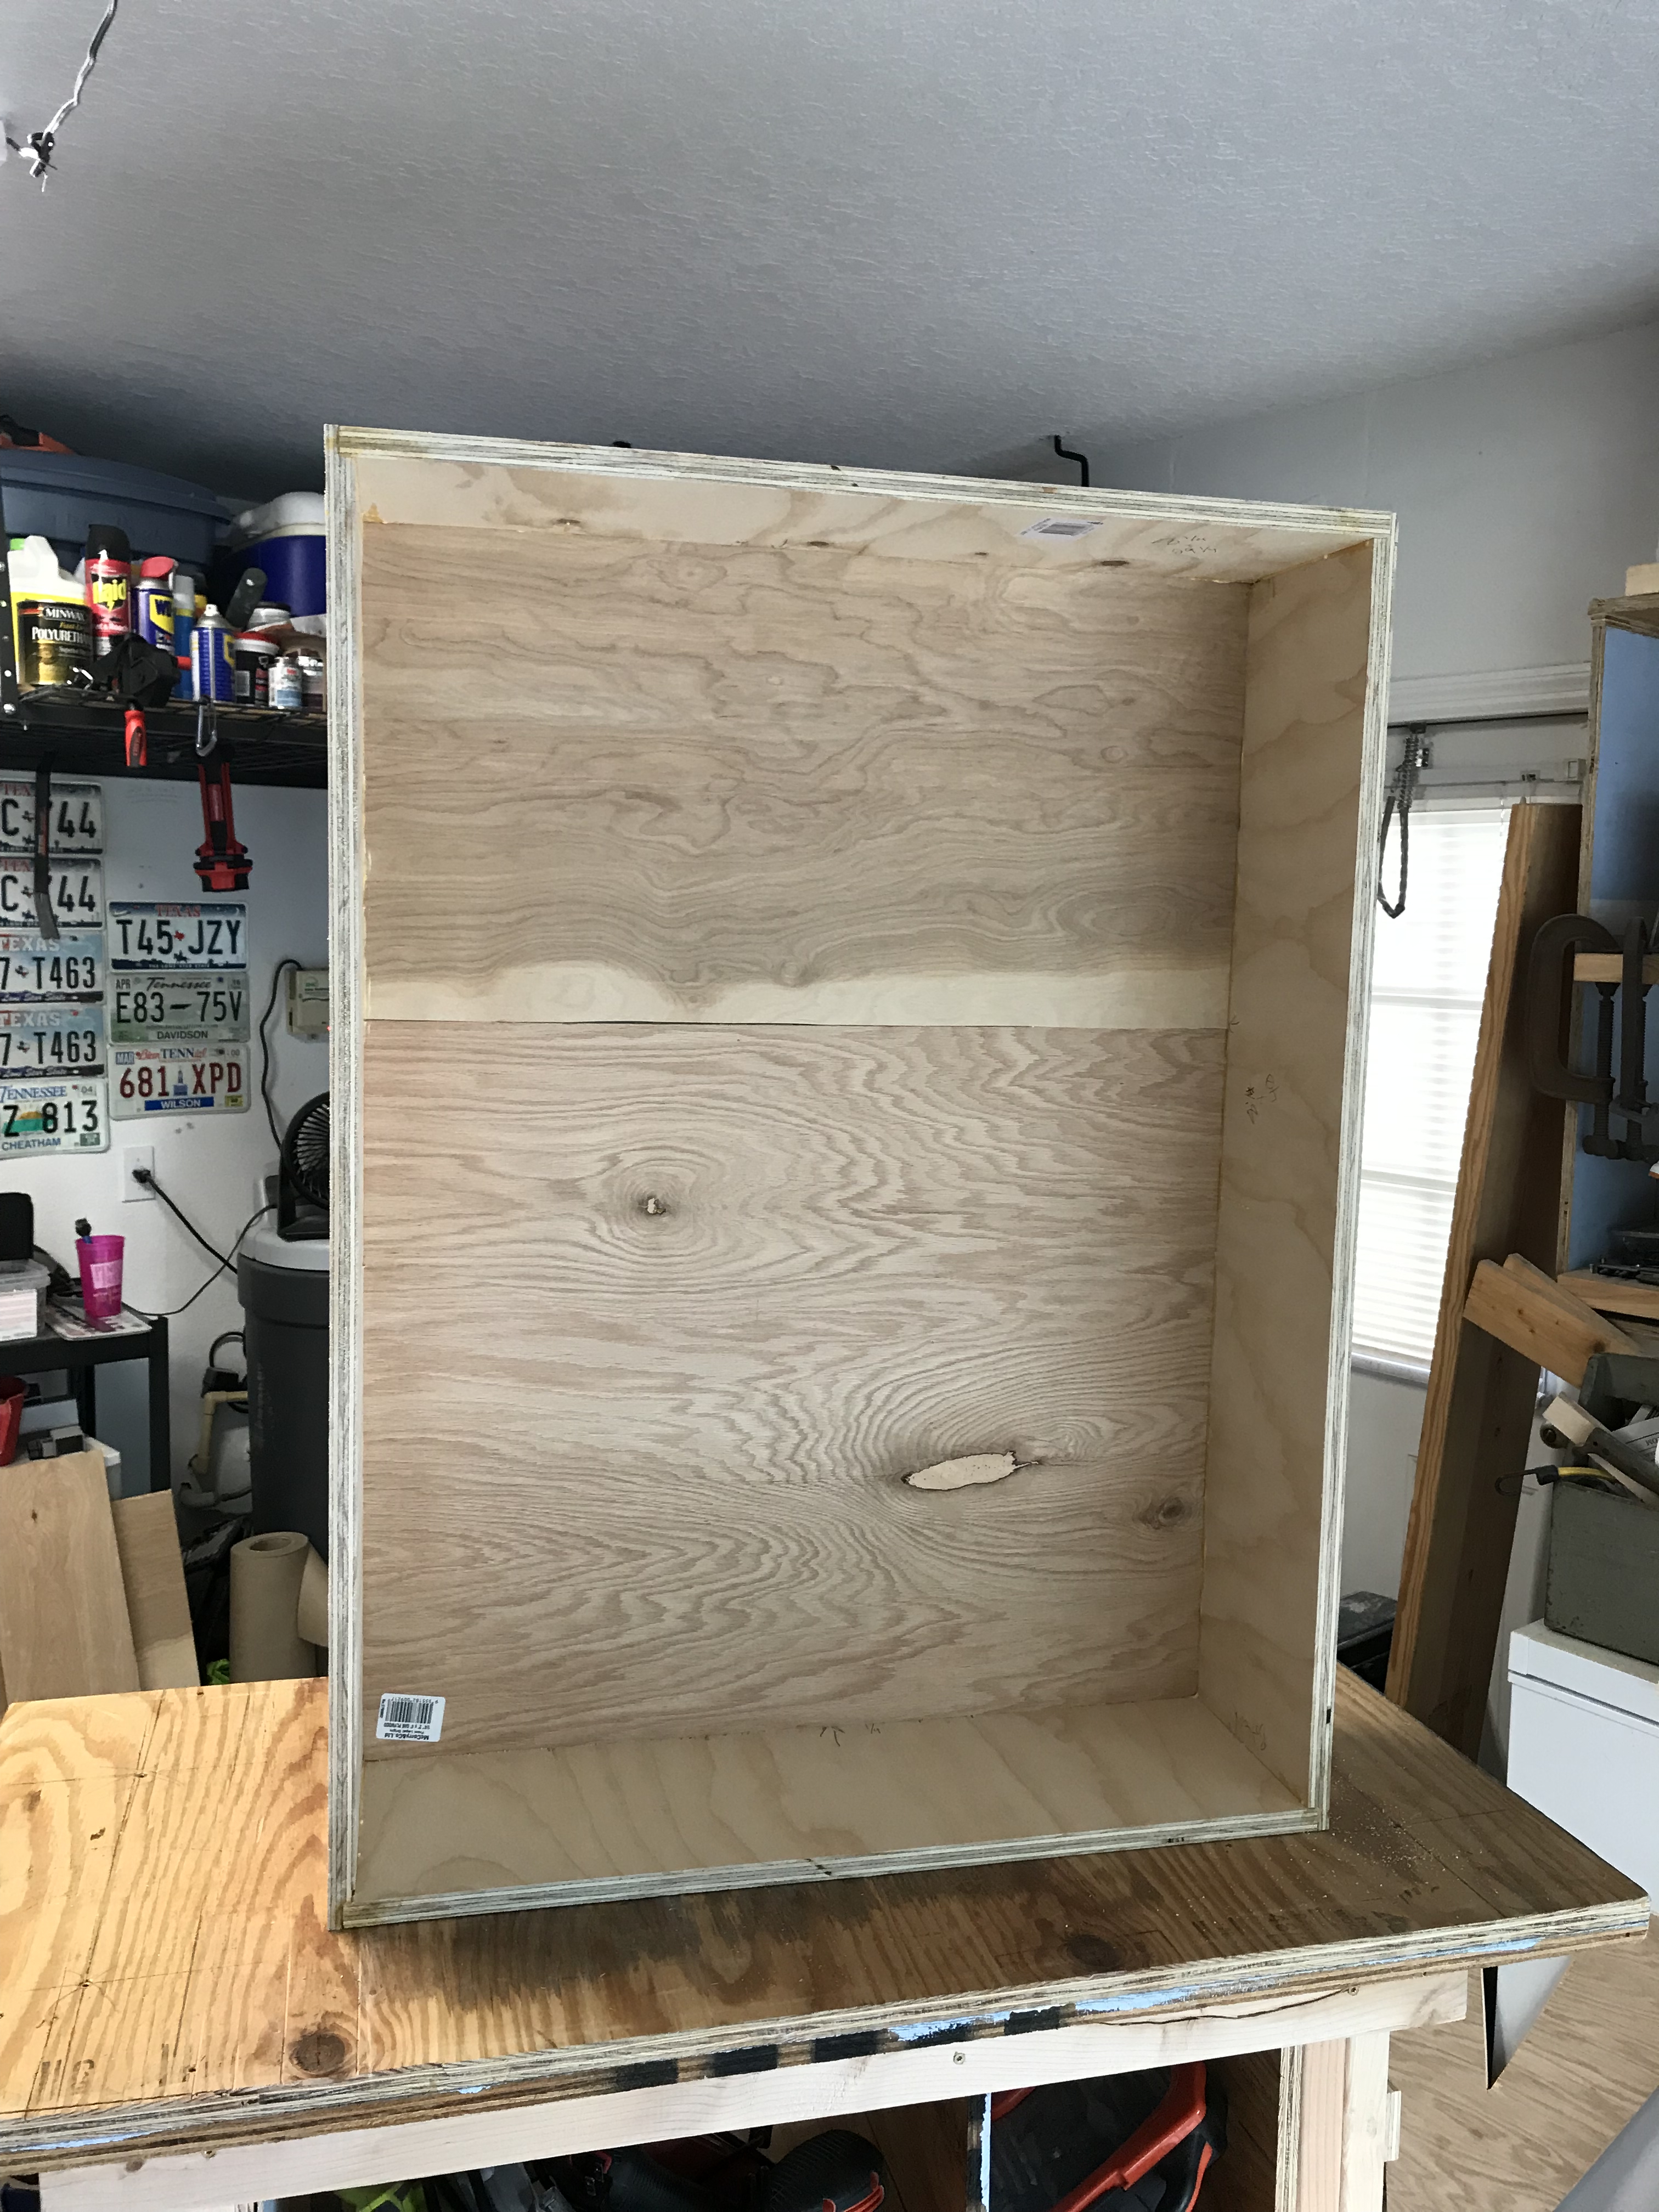
Then, I had to start putting in the plywood cuts.  This is where I realized I had made a mistake.  I custom cut the legs to be a bit taller since I’m 6’2″ tall, but I didn’t adjust my plywood cuts for the dividers and end pieces.  So I got a bit creative and put some bottom brackets in to raise the height of the dividers:

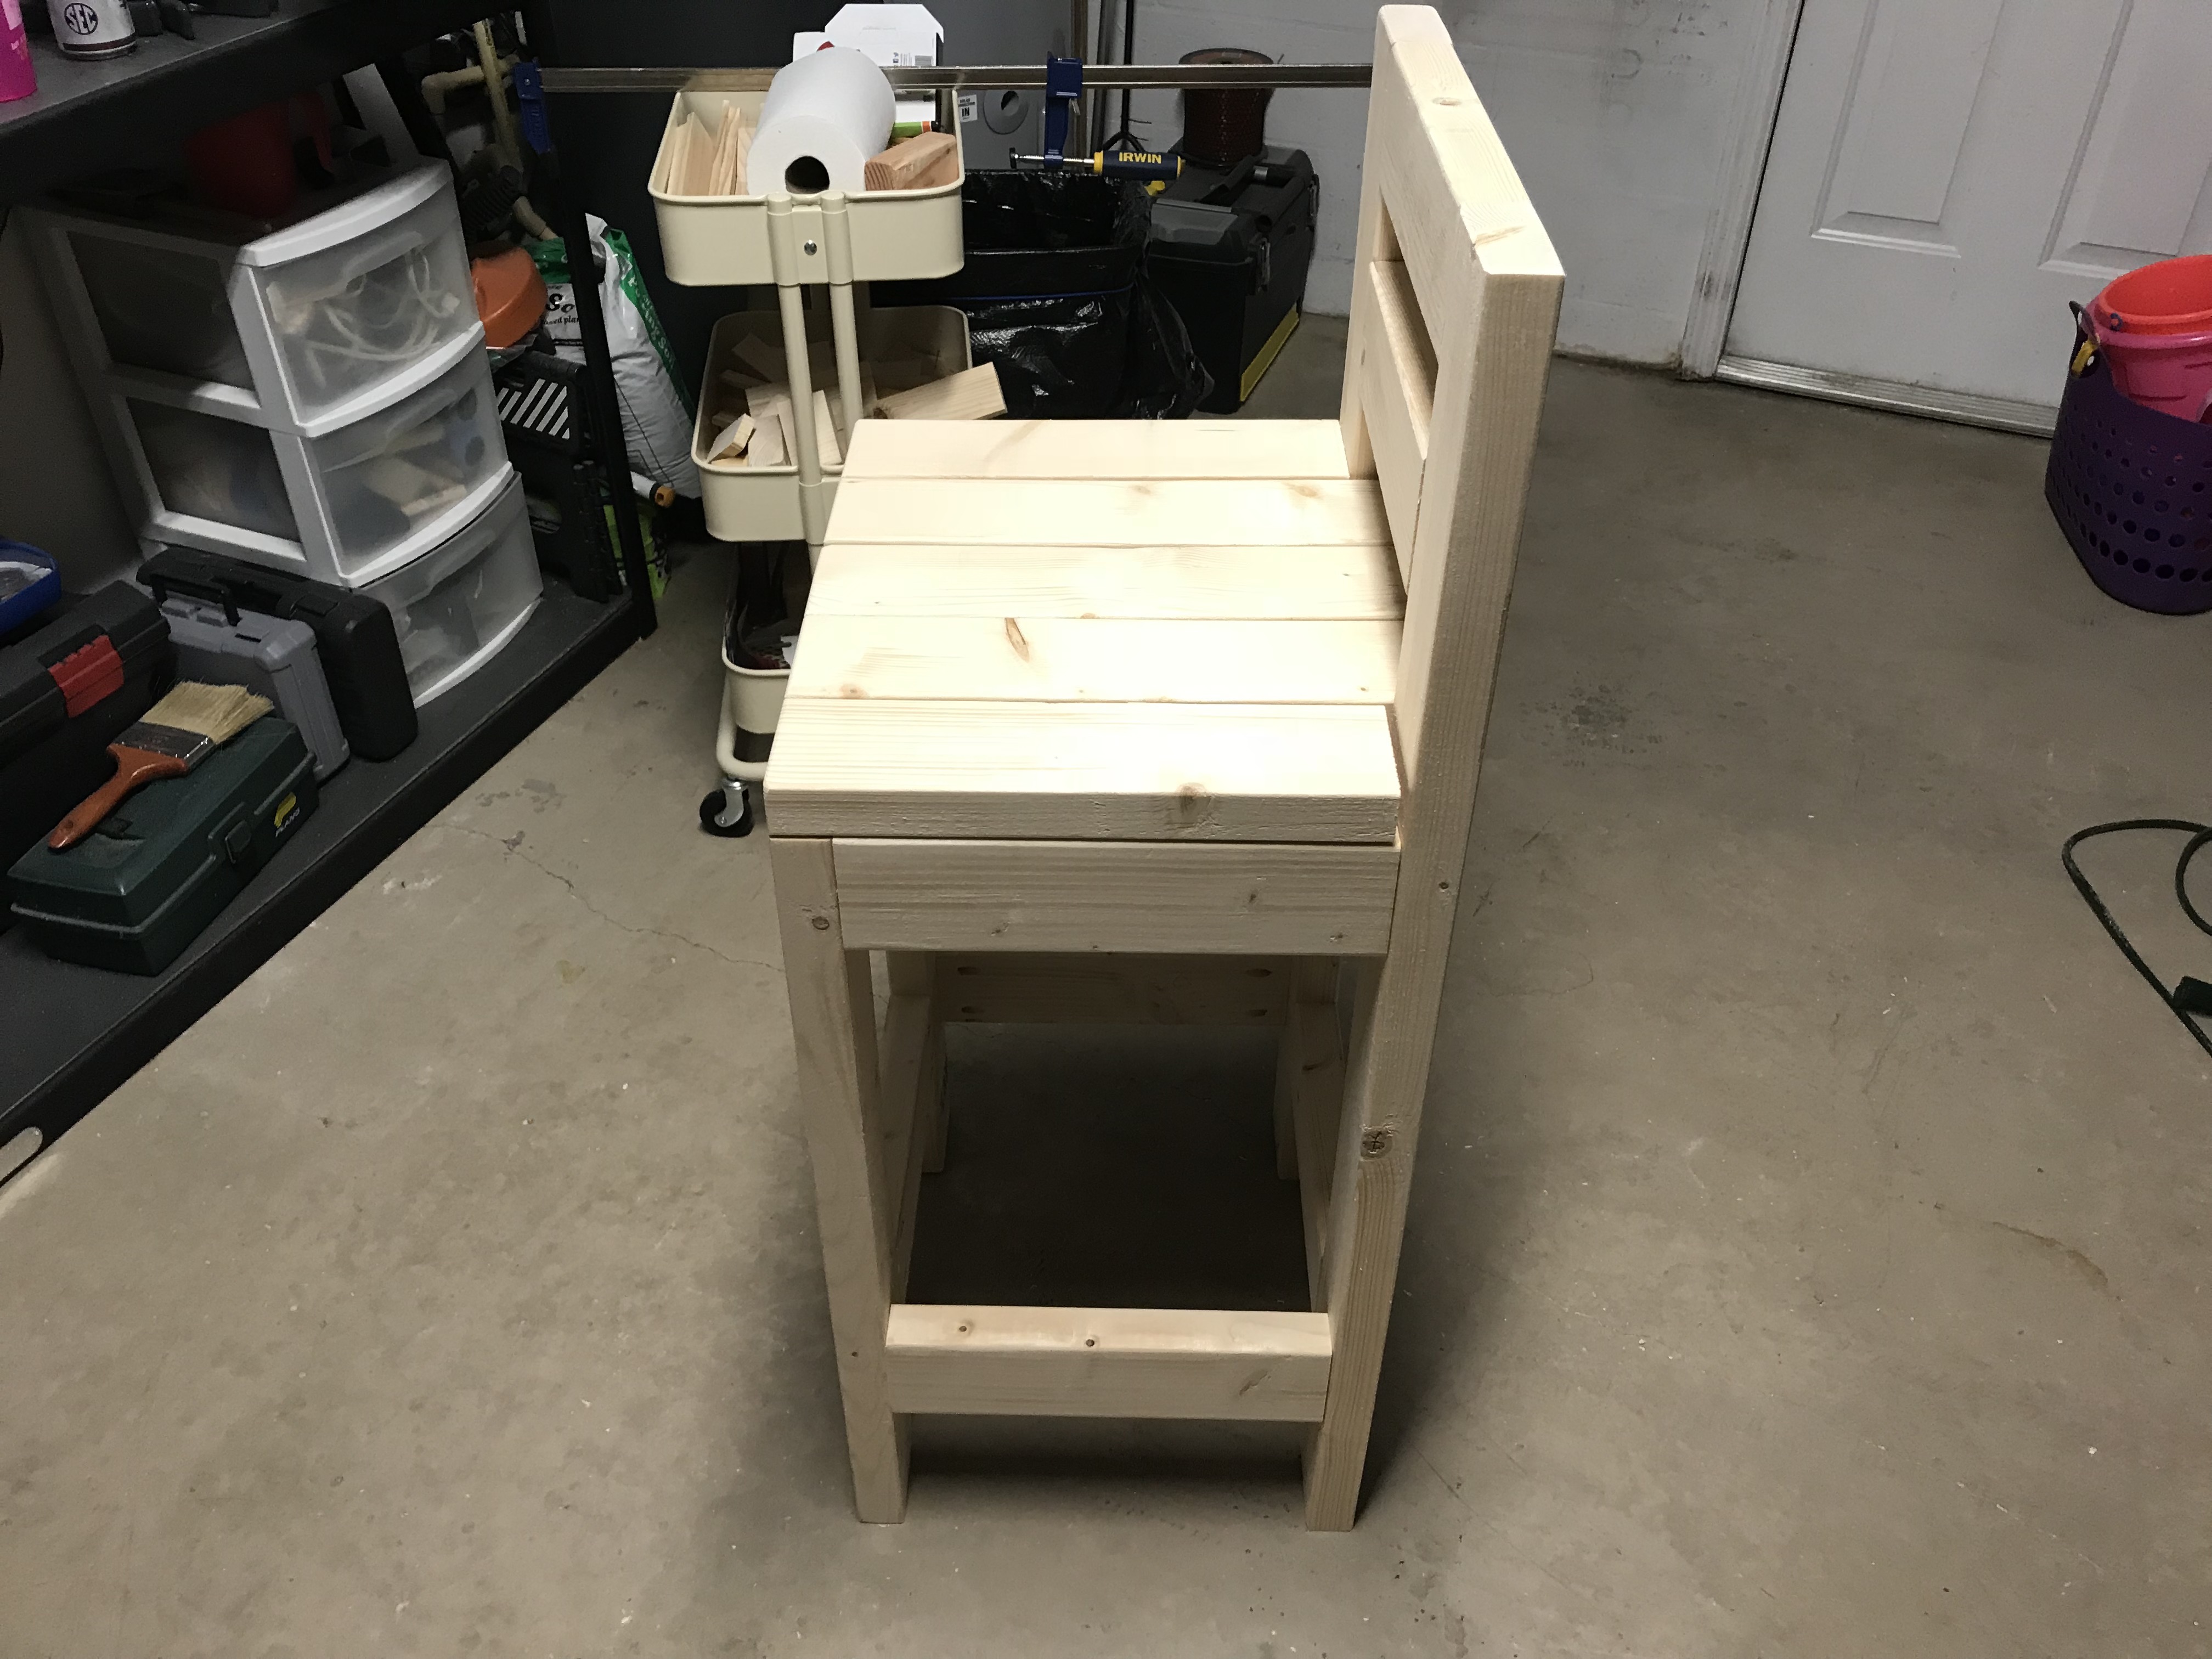
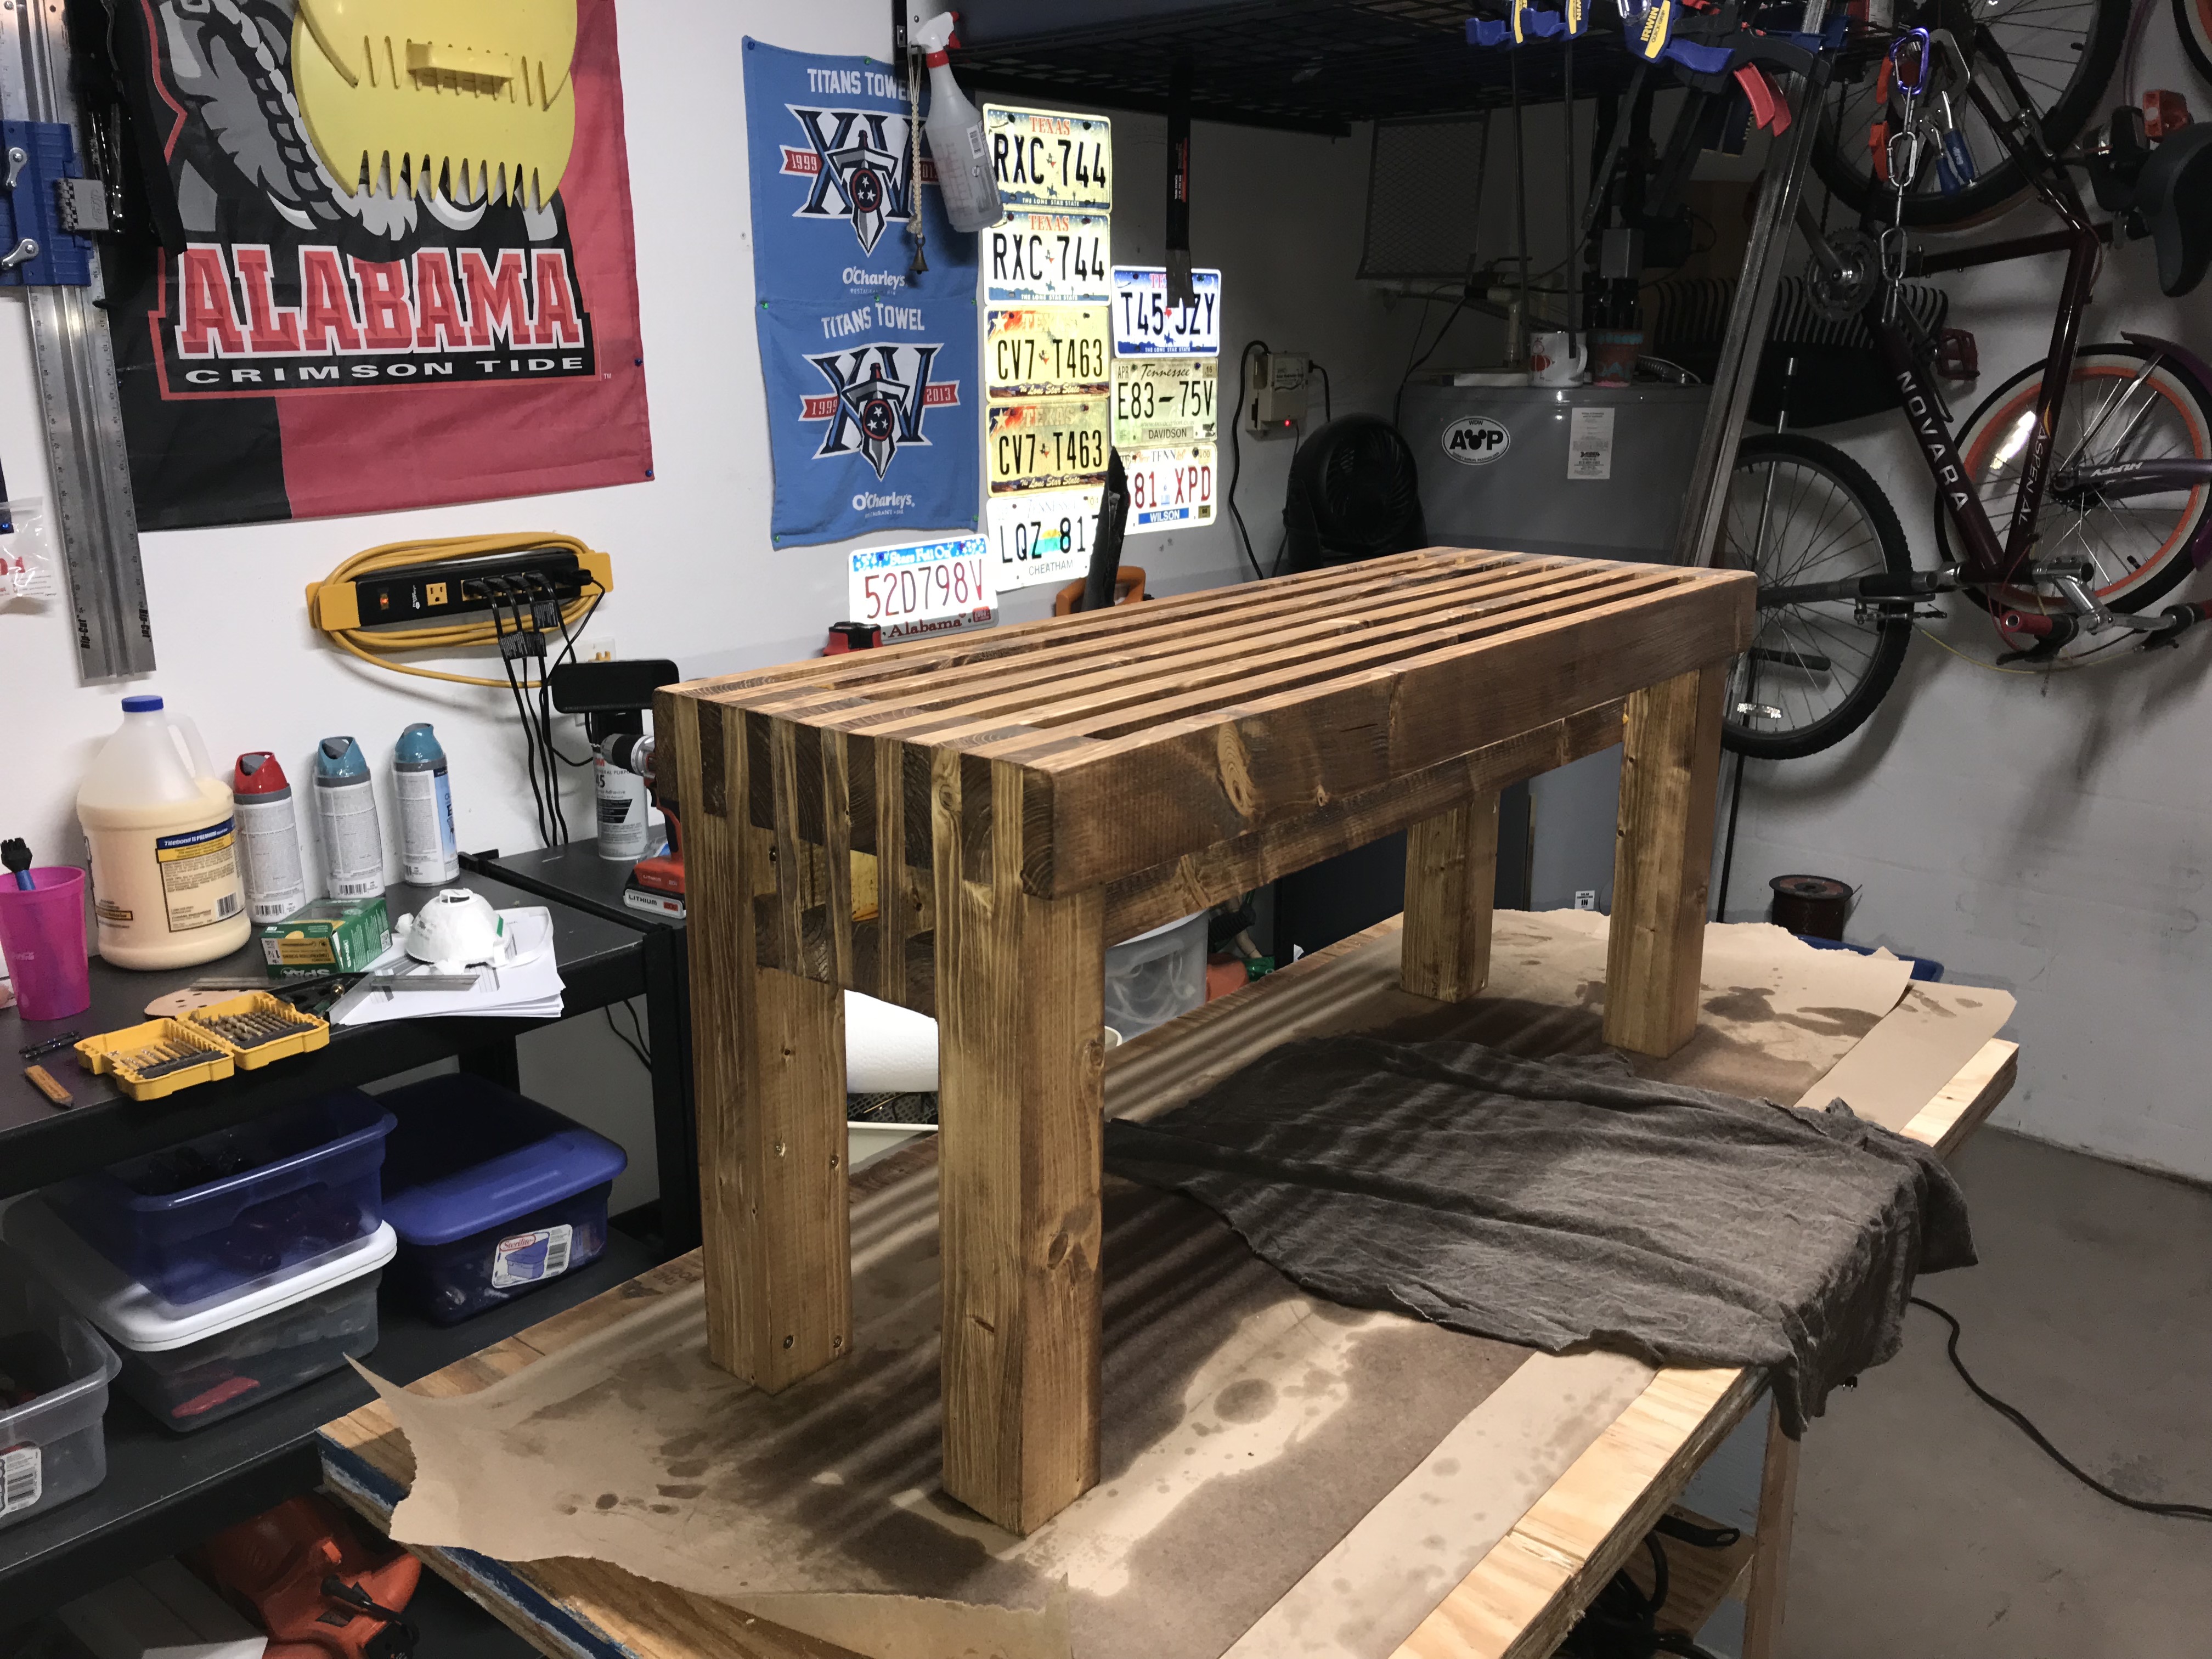
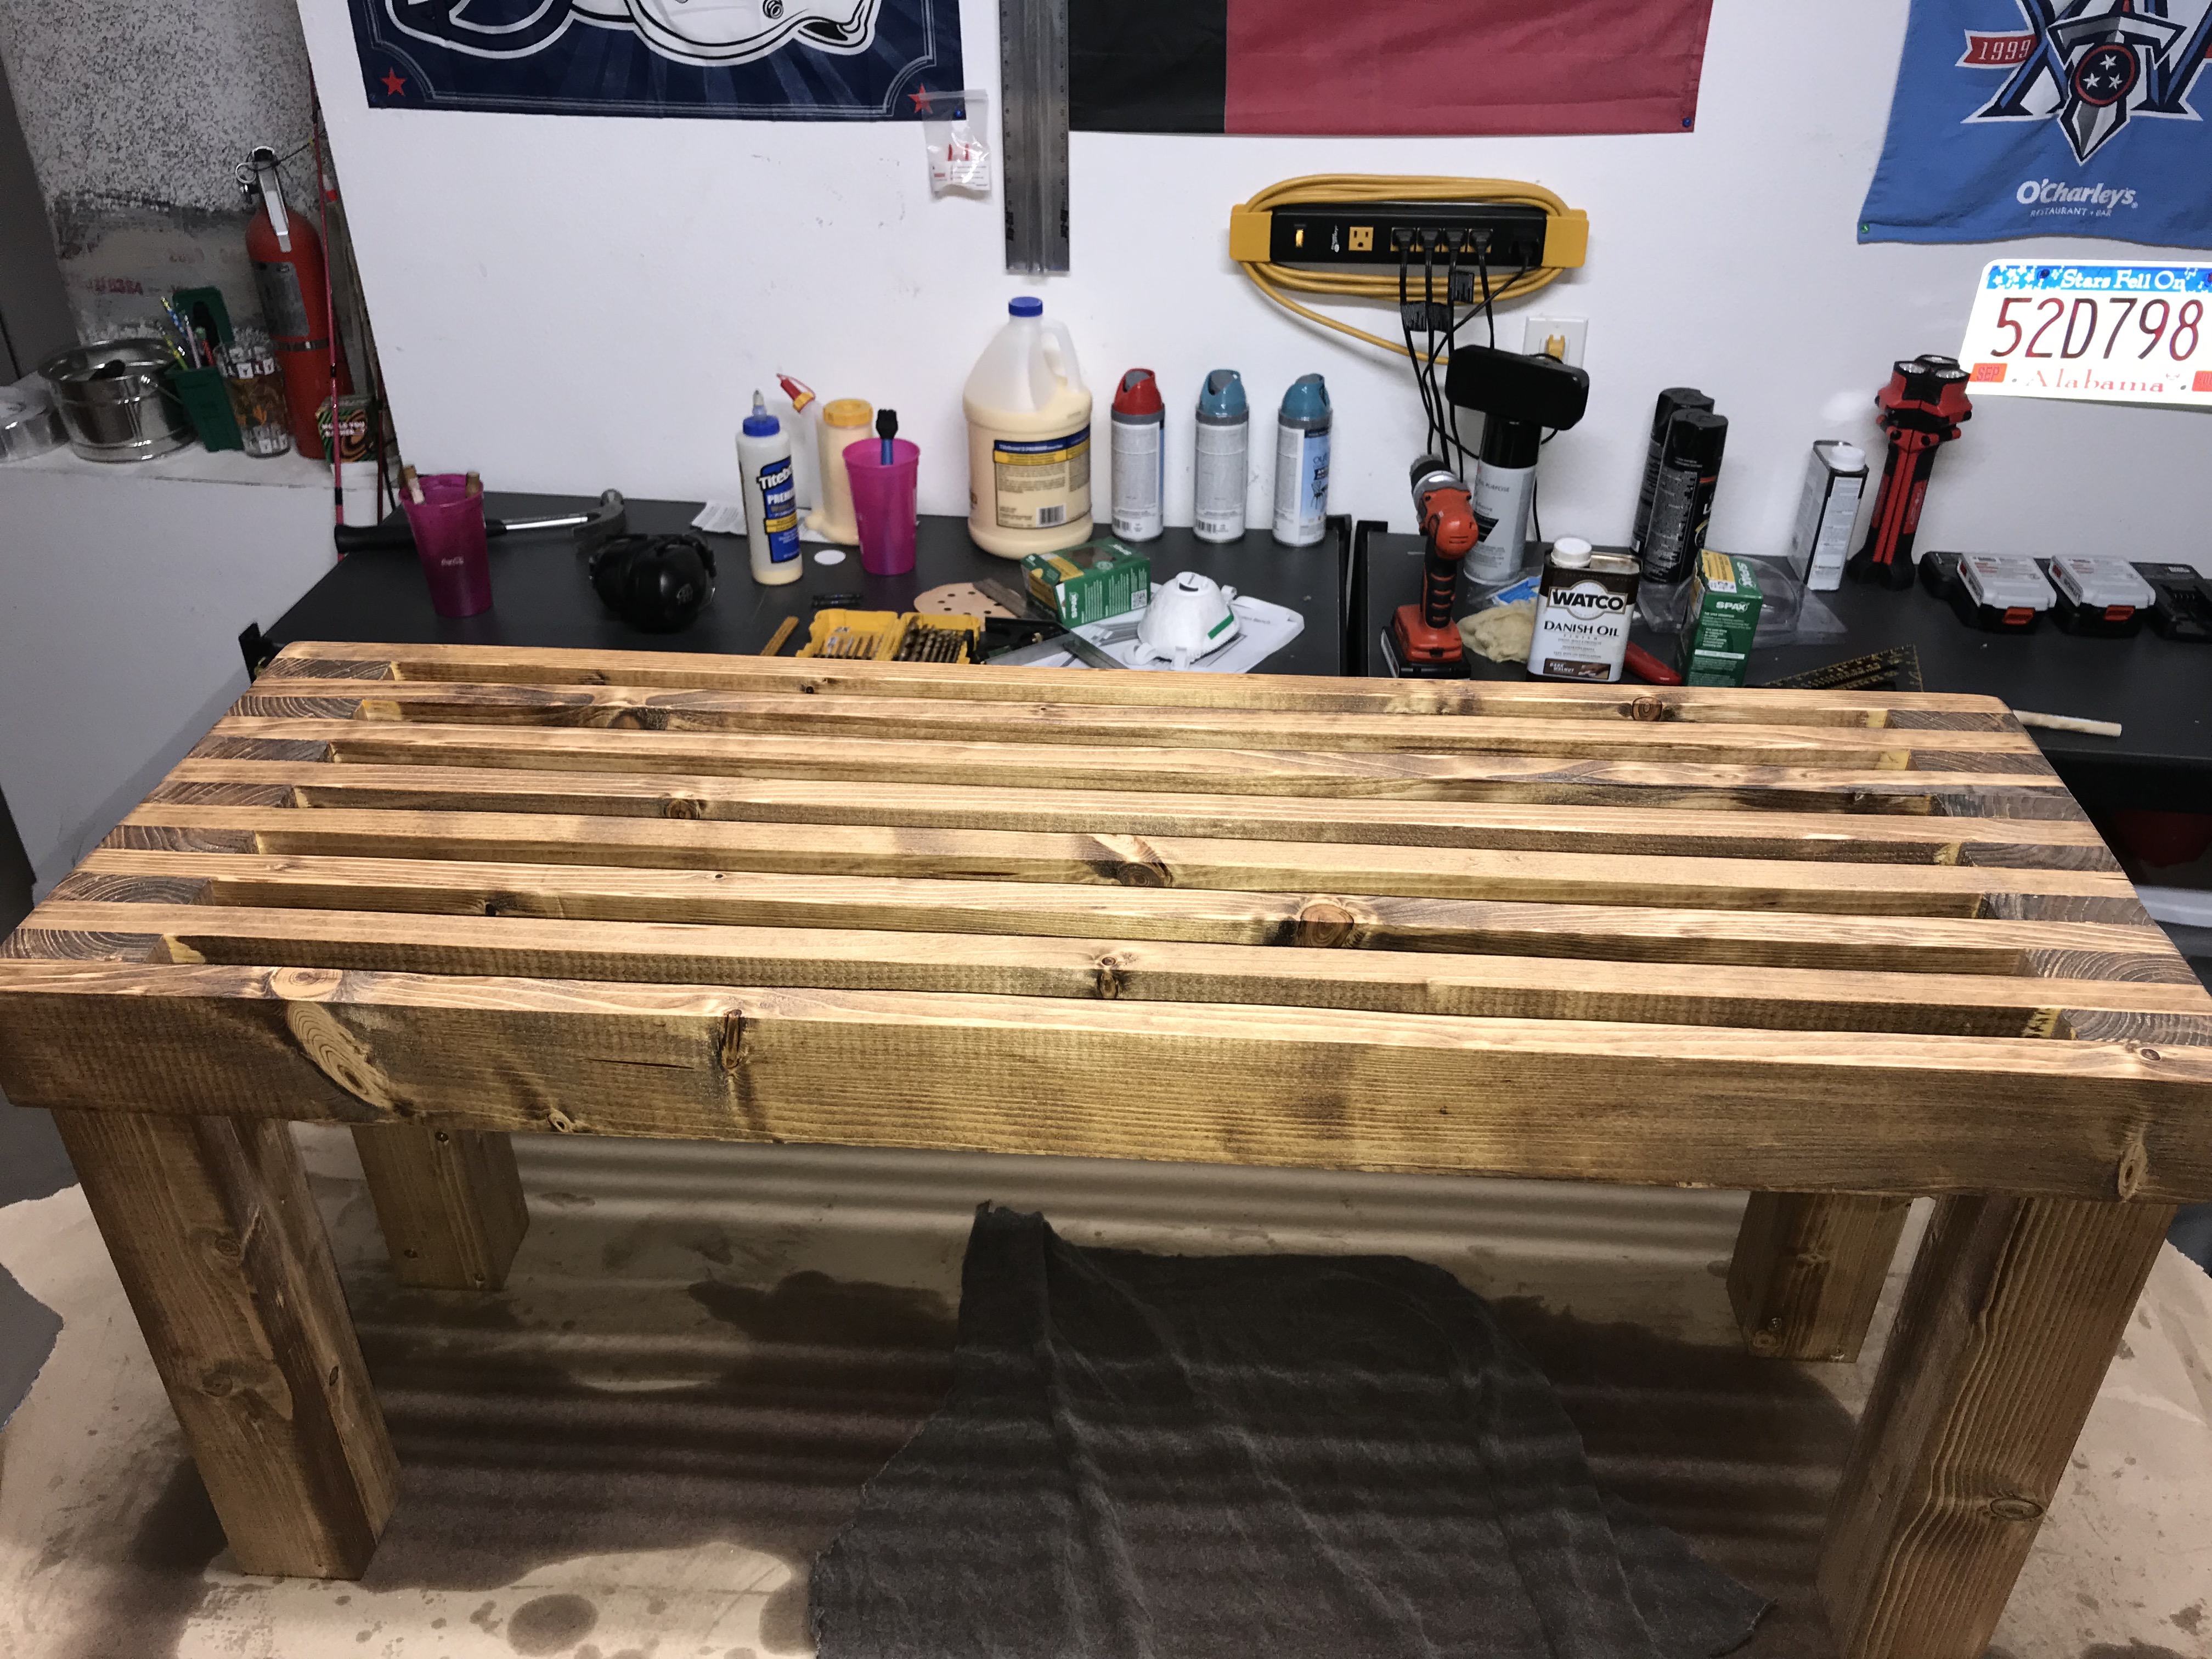
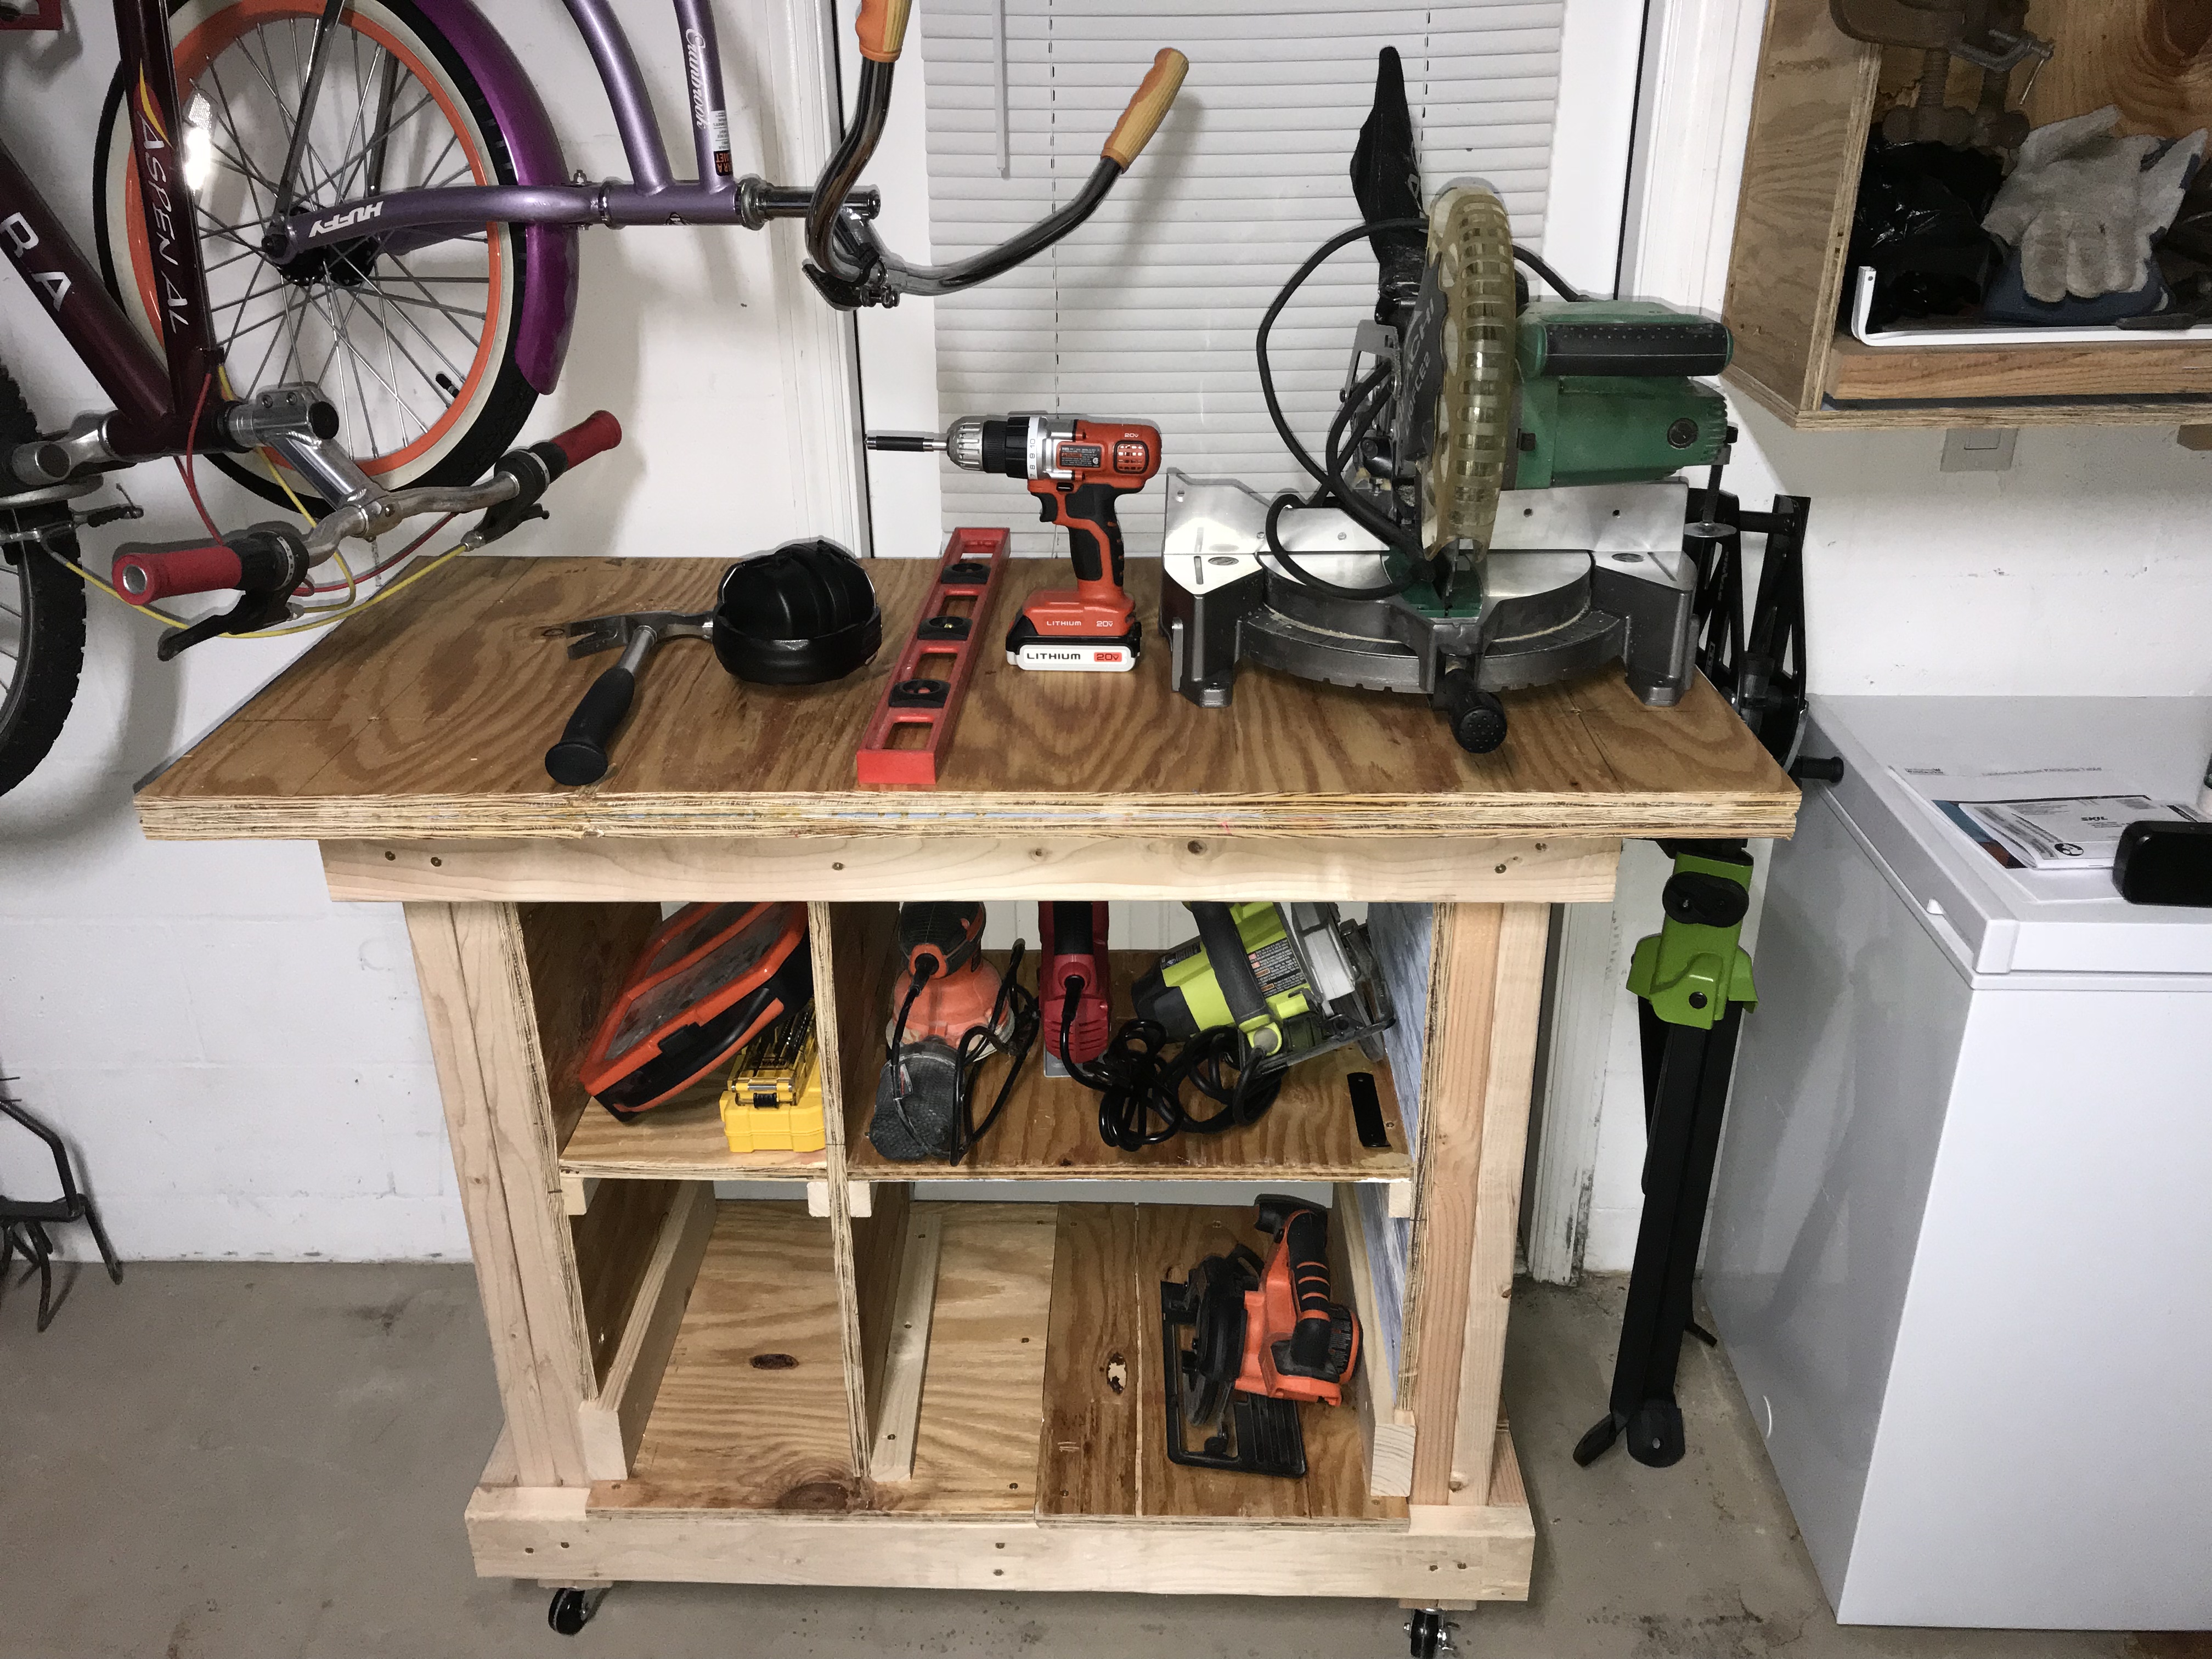
The last part of this was to put the top piece on for my work surface and put the wheels on it.

Listen, a workbench isn’t made to be “pretty.”  It’s made to be used, abused, worked on, and create art.

Here’s my final workbench, complete with some tools on it, and in its storage space tucked out of the way till the next project:

Here’s to many more projects in the future!!

Link to Steve Ramsey’s Youtube channel: STEVE RAMSEY WOOD WORKING FOR MERE MORTALS

Link to Magnetic Wrist Band: MAGNETIC WRISTBAND

Link to Rockwell JawHorse:  JAWHORSE (look around, and be patient, I got mine for much less than advertised here when it was on sale.)