

My first woodworking project ever was my daughter’s bed. I built her a loft bed this past summer that you can read about HERE.
One of the problems in our home is that the secondary bedrooms are small. Most newer Florida homes seem to have smaller secondary rooms. It just doesn’t leave a lot of room for extra things in our young daughter’s room. That’s why I built the loft bed in the first place – to get her bed up off the floor so she would have more room to play in her room. One of my next projects will be to add a desk under the bed.
The one problem with the bed is that it was not easy to get in and out of. I had a ladder on the end that was built into the bed. But I decided to kill two birds with one stone – add storage into the room, and make it easier for her to get in and out of her bed.
While this project was not overly complicated – and the design was very rudimentary – it has made her room and her life a lot easier.
I started with some very thick, heavy, wide boards – some 2″ x 12″ boards. The idea – make shelves and stairs, without spending a lot of time and money.
Here’s what I came up with:
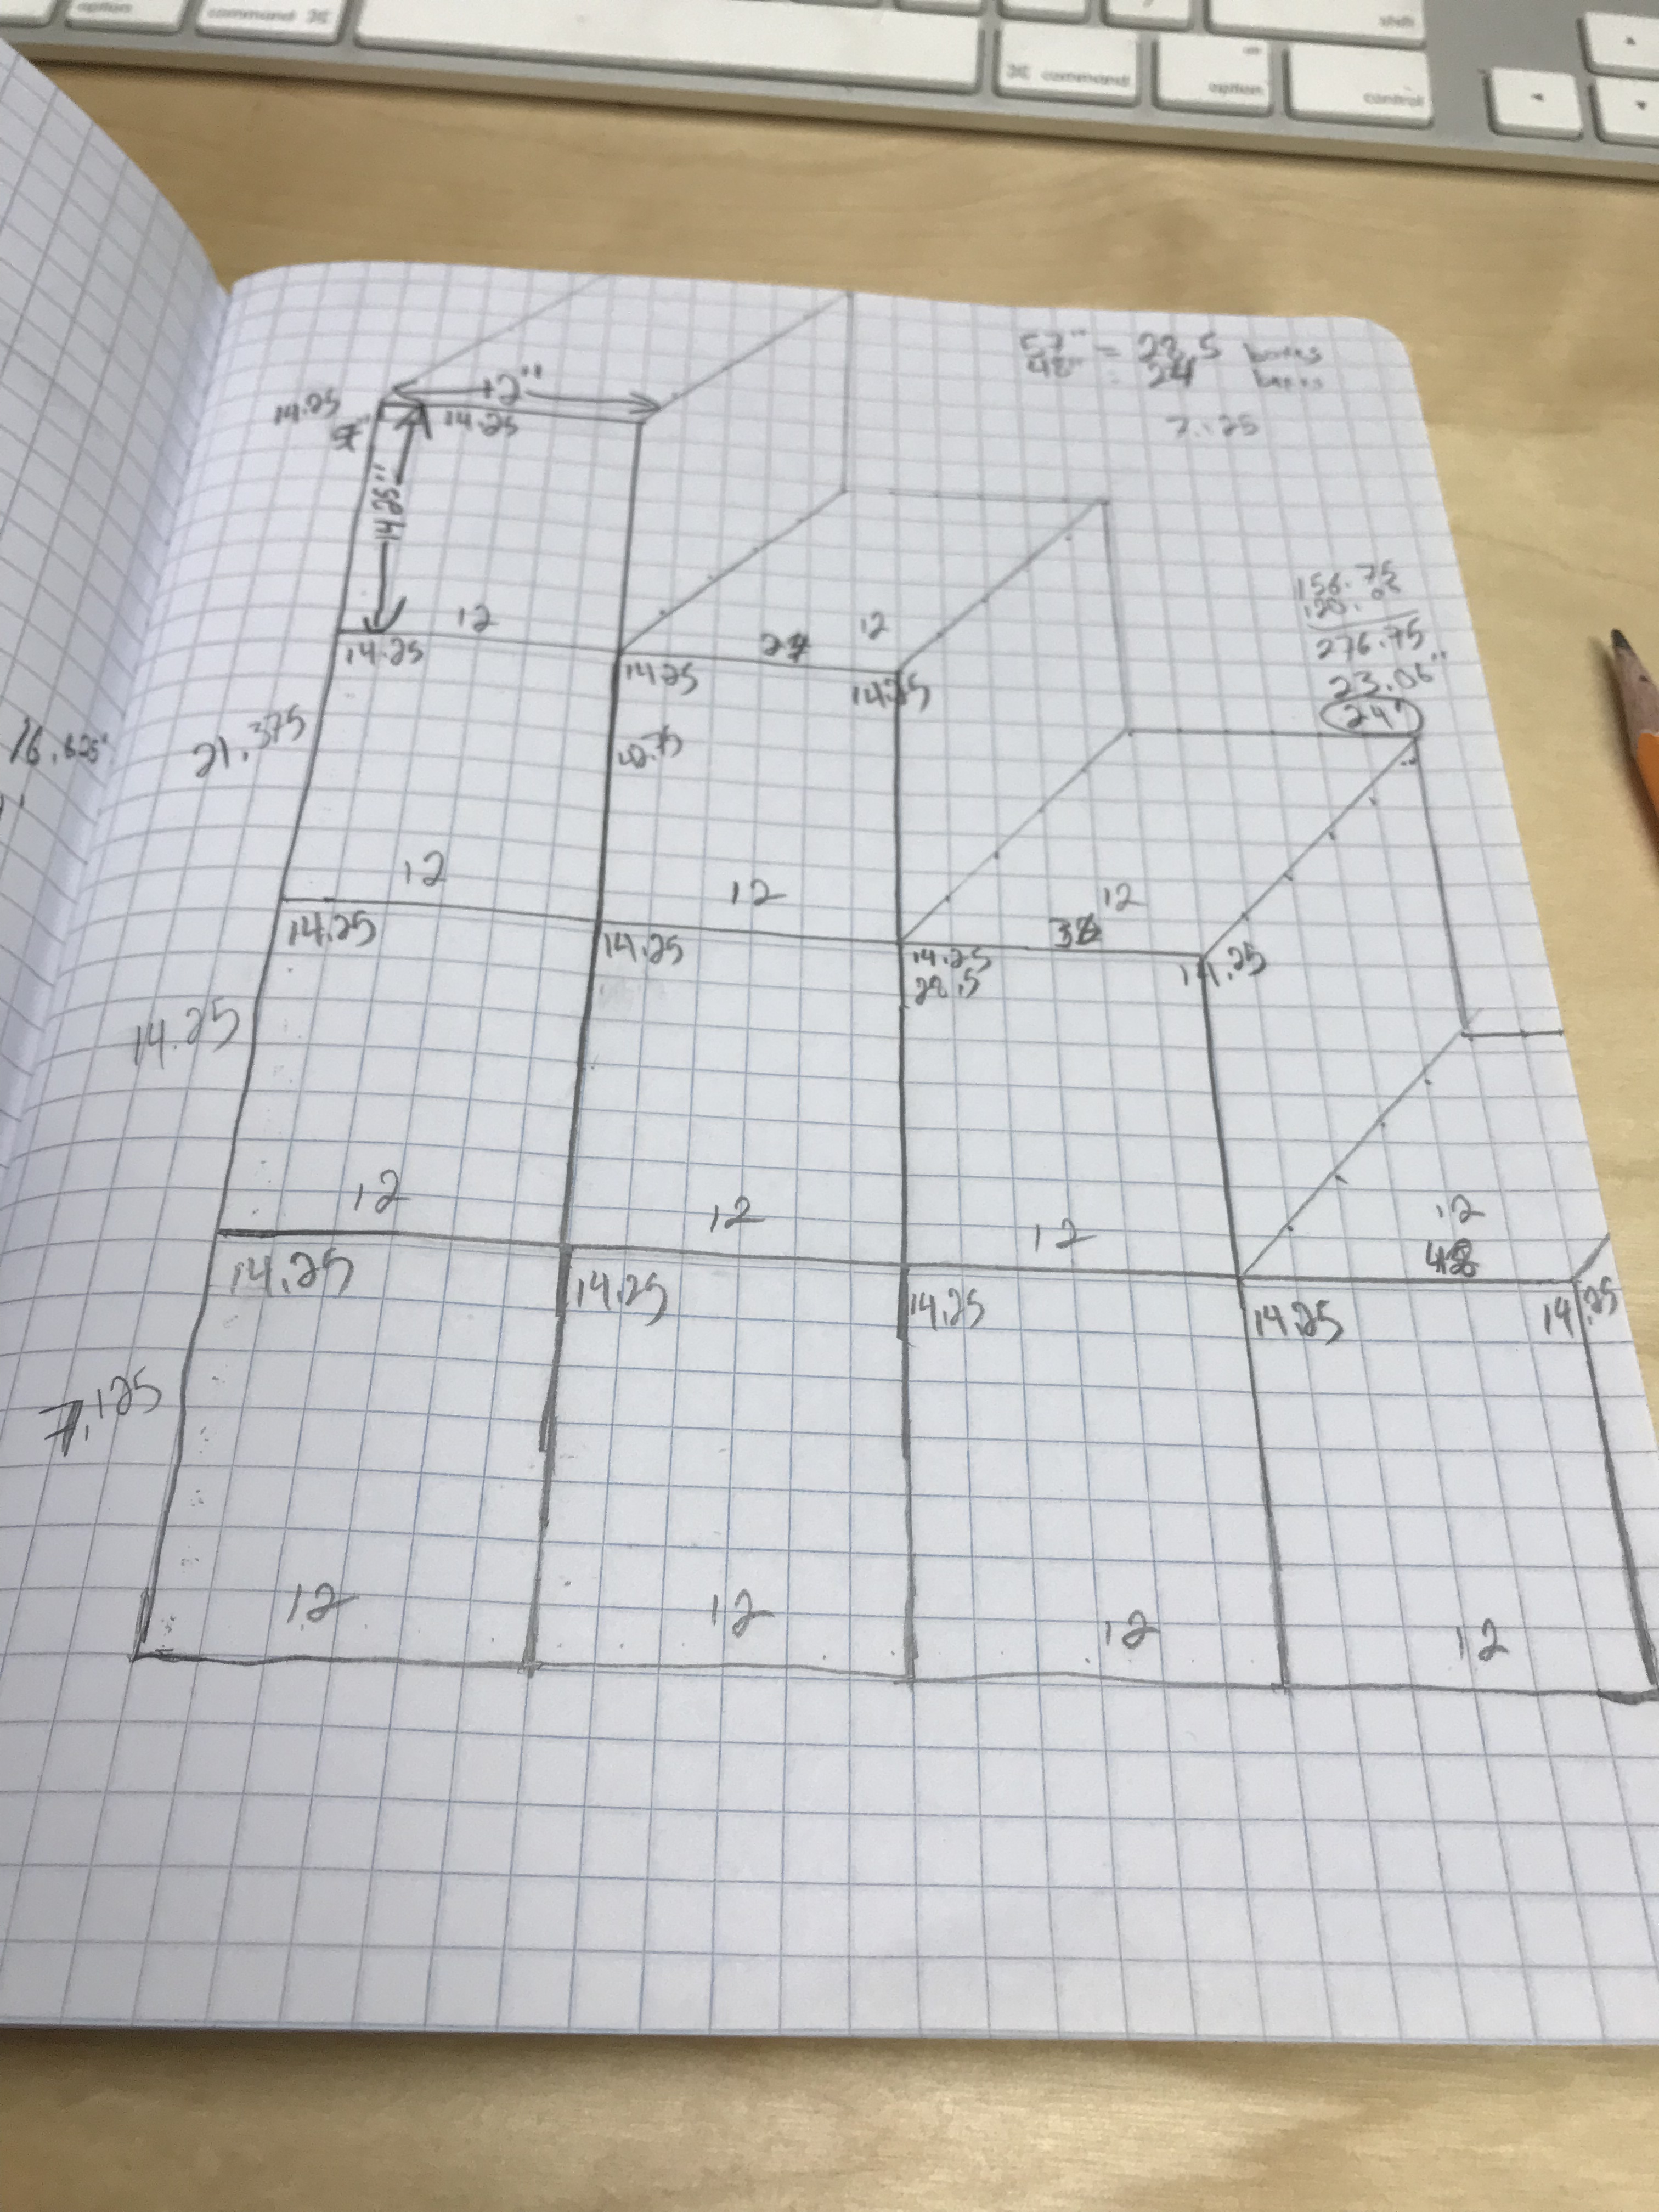
I started out with a crude design in my sketch book. While it didn’t end up exactly like this, it helped a ton in figuring out how much wood I needed, and how big the shelves needed to be.

Measuring, marking, and cutting the first piece. Using a circular saw, I was able to just set the depth and cut it right on my mobile work bench.

The cuts for the stairs/shelves.

Using my Rockwell Jawhorse extension piece to balance the back part of the shelves so I can begin attaching the other pieces.

Starting to come together. I’m not going to cover the screws, because in the original bed, I left everything exposed – plus – we’re going to paint it this summer.

Placing the stairs by the bed. I attached them to the bed with some “L Brackets.” Very sturdy, and it’s not going anywhere. The loft bed had handles on it already for her to climb into it, so the height of the stairs went just under where those handles are.

Josie started filling her shelves right away!

She loves the stairs! It makes getting in and out of her bed so much easier!! You can also see in this picture the bunk bed I made for her American Girl Dolls. That’s where the desk will go eventually.
